What You Need
- 1 Server or Hypervisor
Note: This requires an FQDN unless you are only making the website available internally and 2 servers or a hypervisor capable of hosting 2 VMs.
I set up 2 VMs on my hypervisor, both running Ubuntu Server. From there, I installed Nginx on both. I then configured the reverse proxy to forward traffic depending on the header so I could access both my mail server, which we set up previously with iRedMail, and my website.
Tutorial
To start, I will assume you know how to set up 2 Ubuntu VMs. I will be using my Xen Orchestra Project to spin up 2 VMs for this. If you want to know how to do that, refer to my Xen Orchestra Project.
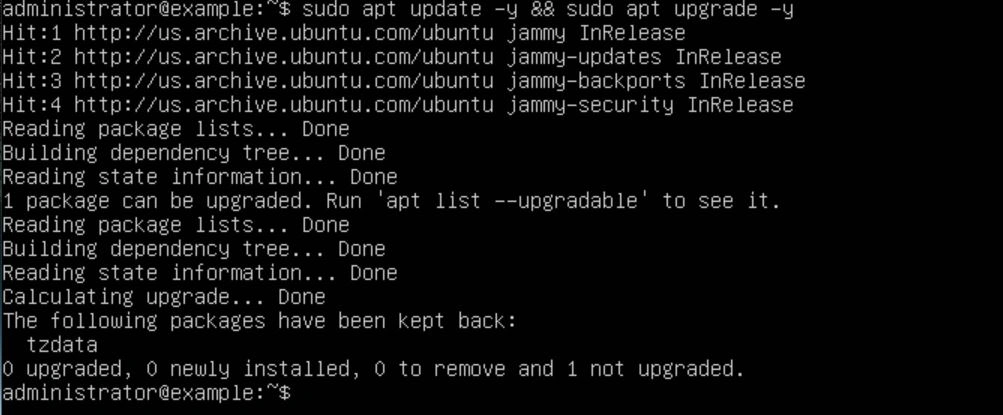
I start by booting up the 2 VM's and accepting all of the defaults, and once you have a shell, it's best practice to update using the command "sudo apt update -y && sudo apt upgrade -y".
Once your servers are done updating, you will need to install Nginx on each of them using the command "sudo apt install nginx". After that is done, confirm that the directory /etc/nginx/ exists on each server.


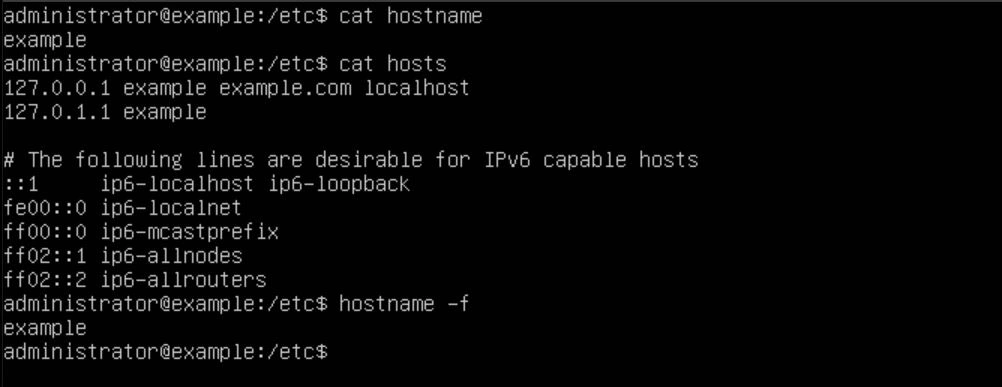
We should configure our /etc/hostname file to contain our proper subdomain of our FQDN. In this tutorial, my FQDN will be example.com, so my hostname will be example this is not required but it is good practice. We also want to edit our /etc/hosts file, adding the line "127.0.0.1 example example.com localhost". Finally, to verify the hostname, use the command "hostname -f". If it didn't change, restart the server. If that still doesn't work, make sure the changes to the /etc/hostname file saved.
Now that we have Nginx installed, we want to create a new file in the /etc/nginx/sites-available/ directory with our FQDN as the name. In this example, I will be using the FQDN example.com.

In this file, we want to specify our Nginx configuration. Make sure to replace {FQDN} with your own FQDN.
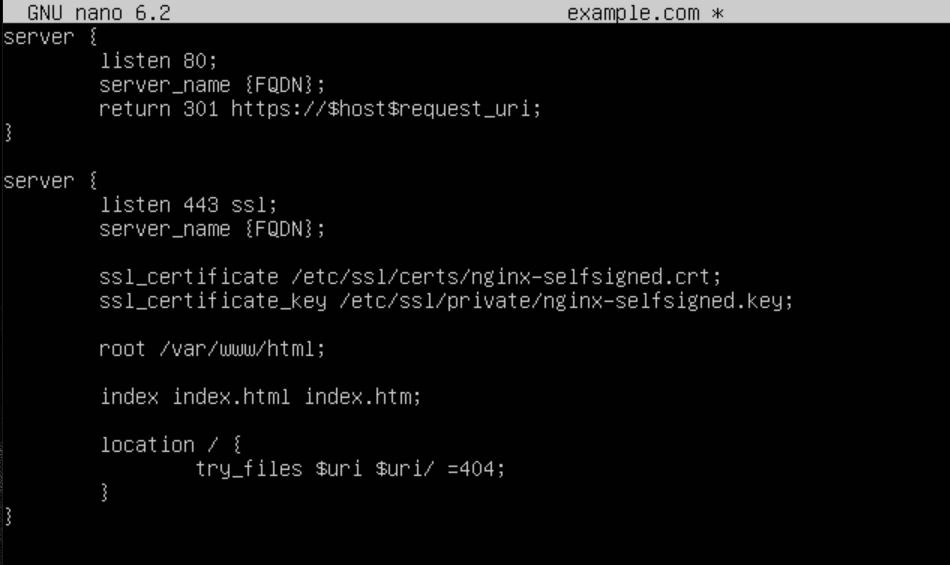
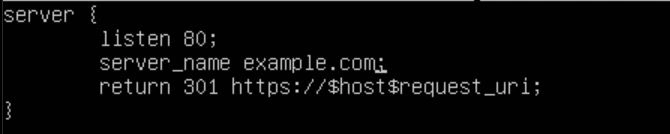
Here is an example of my configuration with my FQDN example.com:
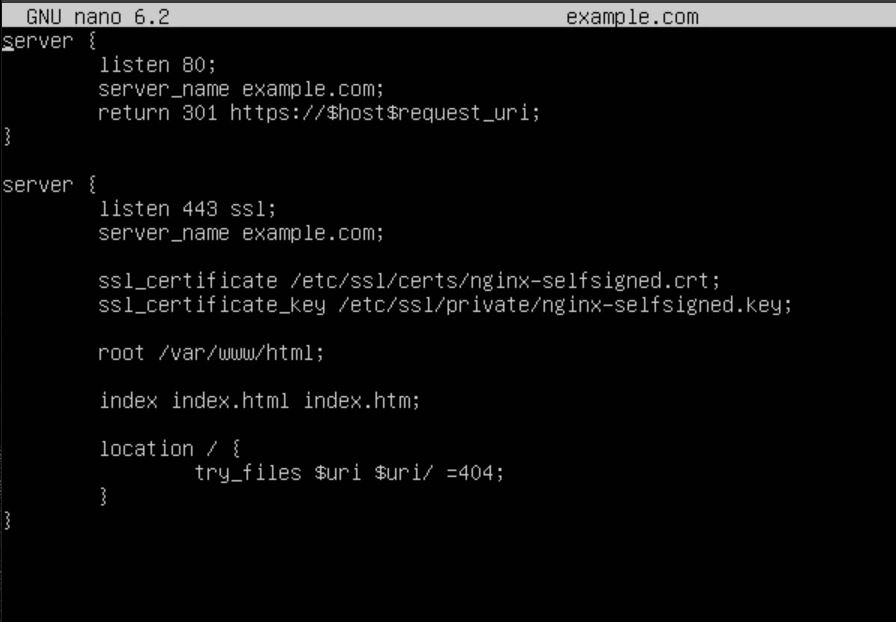
The top server block tells Nginx to listen on port 80 and return a 301 redirect to anyone who visits it.
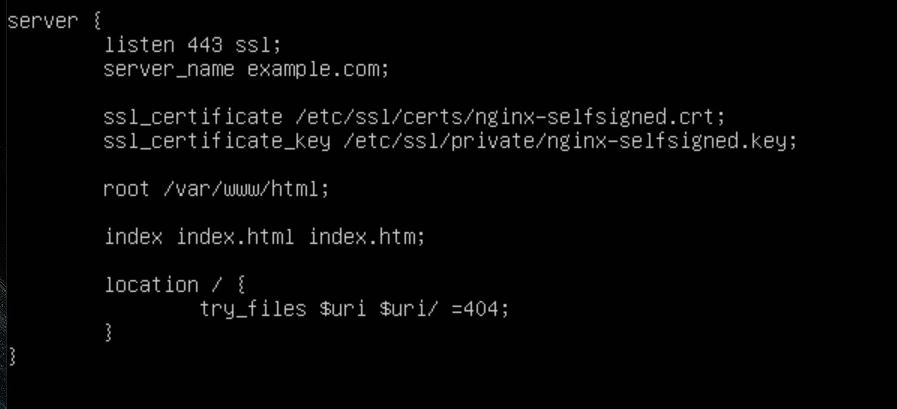
The next server block tells Nginx to listen on port 443. The next 2 lines specify our SSL certificates, which we will be configuring next. Finally, the rest of the configuration block specifies where the root of the webserver will live and what files it will try to load first. Once your configuration is saved, don't forget to remove the default file with the command "sudo rm /etc/nginx/sites-available/default".
Once your configuration is in place, you can save and exit the file. We now want to generate the SSL Certificates so Nginx can function properly. To do this, use the following command "sudo openssl req -x509 -nodes -days 365 -newkey rsa:2048 -keyout /etc/ssl/private/nginx-selfsigned.key -out /etc/ssl/certs/nginx-selfsigned.crt". Thanks to https://www.digitalocean.com/community/tutorials/how-to-create-a-self-signed-ssl-certificate-for-nginx-in-ubuntu-20-04-1 for a great tutorial on generating self-signed SSL certificates.

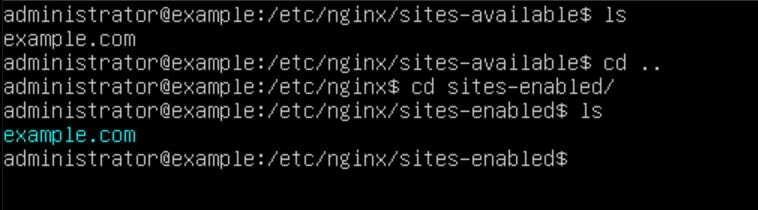
Now that our SSL certs are in place, we need to create a symlink to our config file in the sites-enabled directory using the following command "sudo ln -s /etc/nginx/sites-available/example.com /etc/nginx/sites-enabled/".

With our configuration all set up, all we have to do is test it with the command "sudo nginx -t".

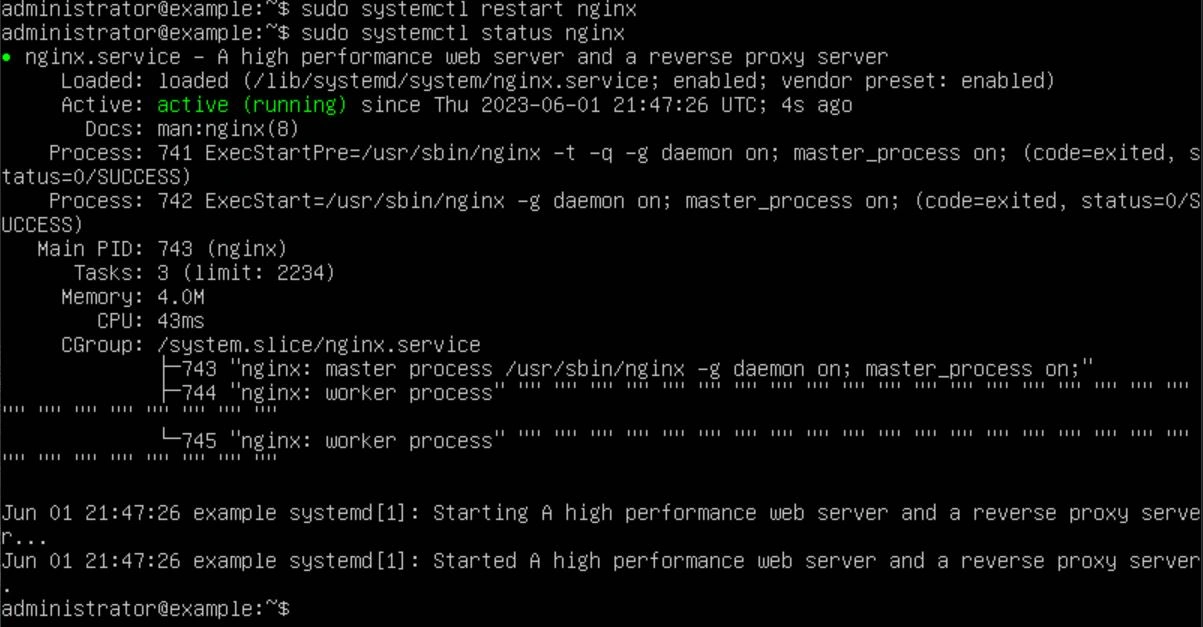
Now that our Nginx config is ready, let's restart Nginx with the command "sudo systemctl restart nginx". Then we can check that it's running and working by using the command "sudo systemctl status nginx". We should see "active" in green text.
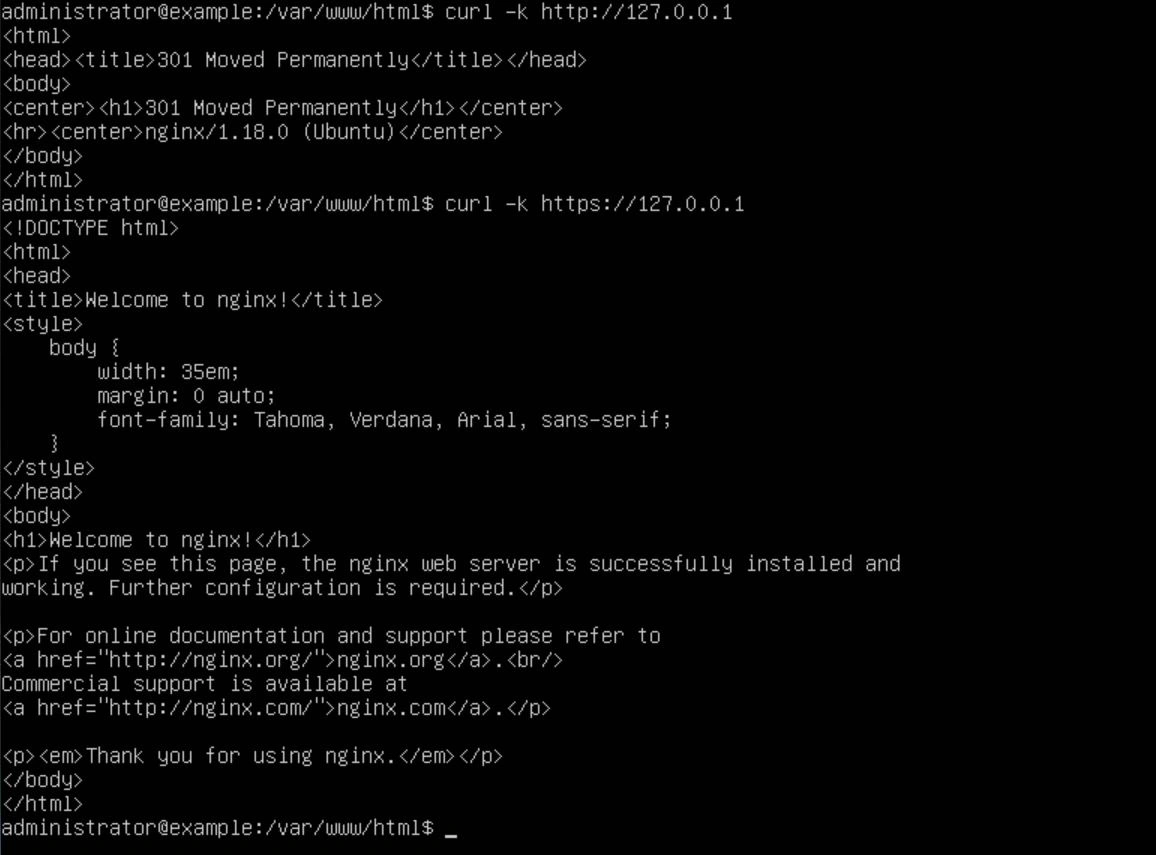
We're almost done with the website; there are just a few more things we need to do. First, navigate to the root of your webserver. In this case, it would be /var/www/html/ and use the command "sudo mv index.nginx-debian.html ./index.html" (this renames the file to index.html). Finally, we want to test the redirect and connection functionality using the following commands: "curl -k http://127.0.0.1" (this will return the 301 HTTP packet). If we do not get a 301, there is an error in your configuration file. The next command tests SSL: "curl -k https://127.0.0.1" (this will return the HTML of our website).
Now that our website is working, we can put the HTML files in the root directory of the webserver located at /var/www/html/ to serve up whatever content we want. Also, make sure you take note of the IP address that your website has. In this instance, my IP is 192.168.2.10.
Now that the web server is up and running, let's move on to configuring the reverse proxy. On the reverse proxy, we want to perform the same steps as before: create a new file called {your FQDN}.conf in the /etc/nginx/sites-available/ directory and create a symlink with this command "ln -s /etc/nginx/sites-available/example.conf /etc/nginx/sites-enabled/", edit the /etc/hosts file and the /etc/hostname file; however, change the hostname to something different. In my case, I will be using "revproxy".

Now we want to edit our configuration file to forward all traffic to our backend webserver, which is still on IP 192.168.2.10. Below you will find our configuration for port 80.

Next, we want to configure the SSL side of things, so we will set up a server block below our port 80 server, listening on port 443.

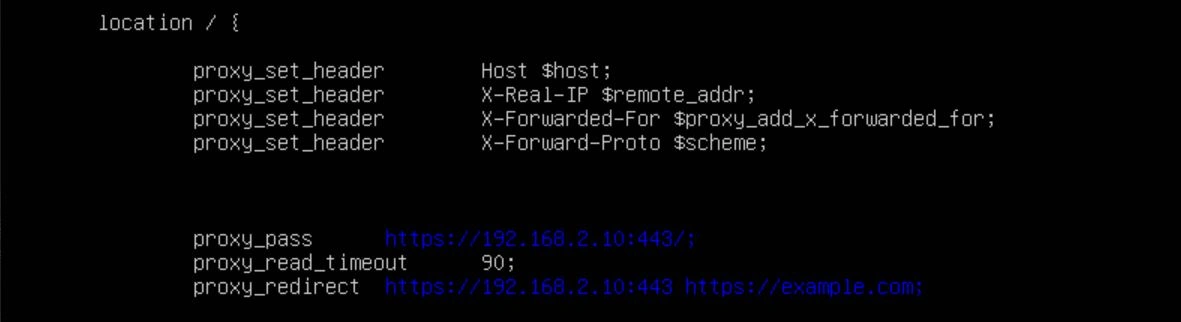
The next part of the server block will set the proxy headers and where to redirect to.
Finally, we will be setting some security headers. There are many ways to defend a server, and this is just a small part of it. I will be compiling a list of best practices and how-to's when I get the time, but for your test environment, this should work for now.

Now that the reverse proxy is configured, it's time to test. Edit your /etc/hosts file to include the line "192.168.2.10 example.com" and then use curl to see if you're being redirected to your backend website.
One of the last steps is to configure your firewall. My reverse proxy is set to 192.168.2.11, so I went to my router to configure port forwarding. I forwarded port 80 and 443 to 192.168.2.11.
Congratulations! Your website should be available from your public IP now. But don't celebrate yet; you still need to configure your DNS records and get real certificates that aren't self-signed. For more information on how to do that, refer to my DNS and SSL project.