What You Need
- 1 Server or Hypervisor
Note: This requires an FQDN unless you are only sending mail internally. Also, the minimum specs are 4 GB of RAM, and I recommend at least 500 GB of storage. If you don't know what an FQDN is, I would recommend reading through this tutorial (https://www.hostinger.com/tutorials/fqdn) to understand the terms I use in this tutorial.
I spun up an Ubuntu server on my hypervisor, configuring all the default settings. From there, I used `wget` to download the installer from iRedMail (https://github.com/iredmail/iRedMail/archive/refs/tags/1.6.3.tar.gz). After unzipping the file, I ran the script called `iRedMail.sh`.
Tutorial
To start on your hypervisor of choice, spin up an Ubuntu server. The ISO is available here (https://ubuntu.com/download/server). In my case, I will be using my XCP-ng server running Xen Orchestra. Give the VM at least 4 gigs of RAM, 2 vCPUs, and 200 gigs of storage. But if you plan to use it on any scale, I would give it 500+ gigs of storage.

When installing the ISO, make sure you configure a static IP. In my case, I will be using 192.168.2.5. Also, enable SSH access for your own sanity.
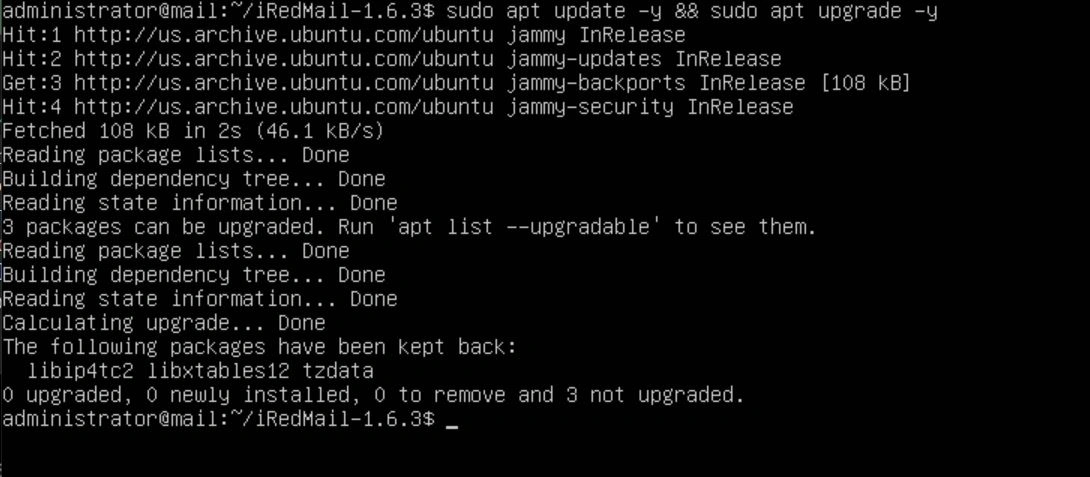
Once the Ubuntu server is up and running, start by updating using the commands "sudo apt update -y && sudo apt upgrade -y".
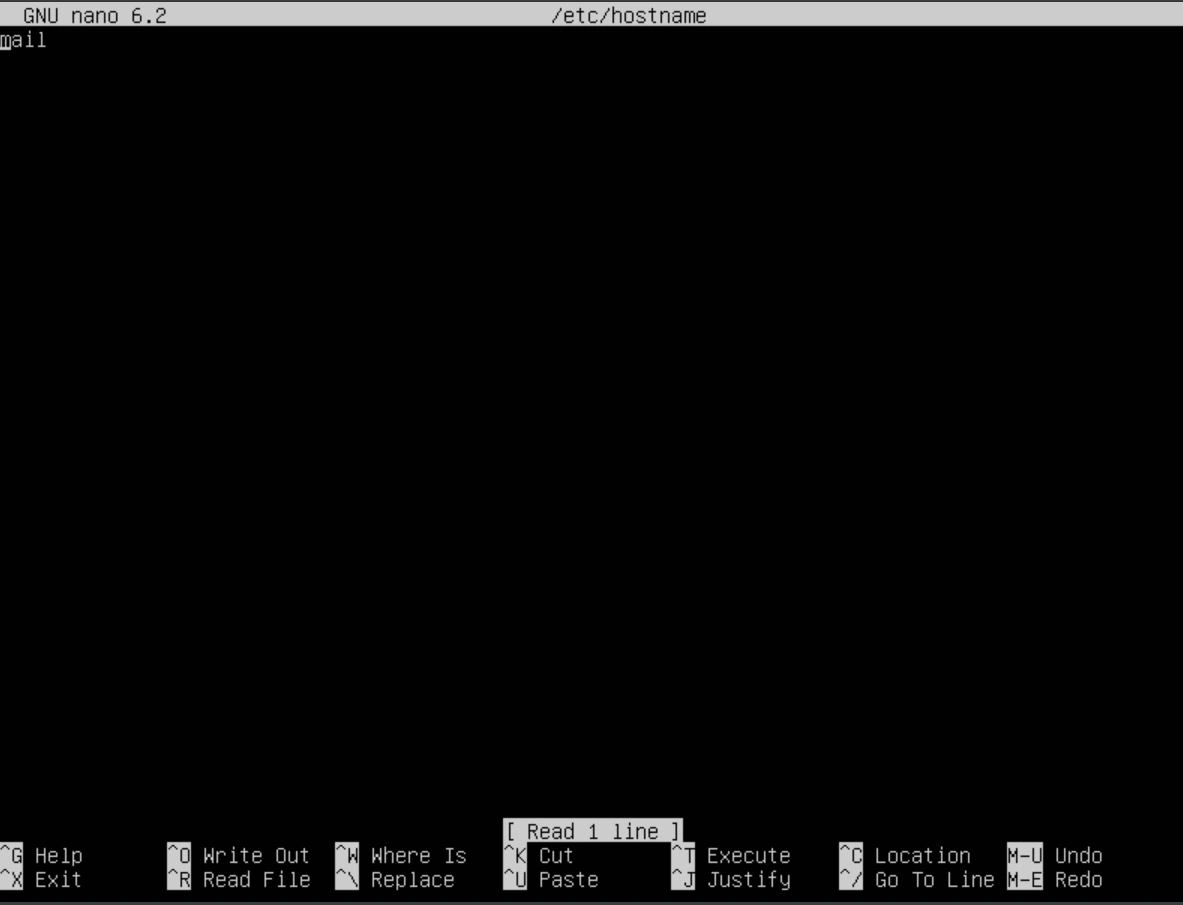
After the update is done, edit the /etc/hostname files to be a subdomain of your FQDN. For example, if my FQDN was example.com, I would make the hostname for this server "mail" so when it's deployed, we can configure it to be reachable via mail.example.com.

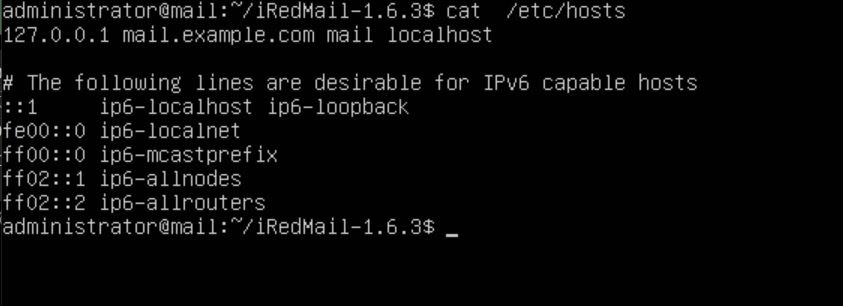
Now that the hostname is set, we want to configure the DNS records for our loopback address. To do this, edit the /etc/hosts file and make the top line "127.0.0.1 {your sub domain}.{your FQDN} {your subdomain} localhost". In my example, I will be using "example.com" as my FQDN and "mail" as my subdomain.
Now run the command "hostname -f". If it doesn't display the updated hostname, then reboot the server. If you still don't see it, check the files /etc/hosts and /etc/hostname to make sure your changes saved.

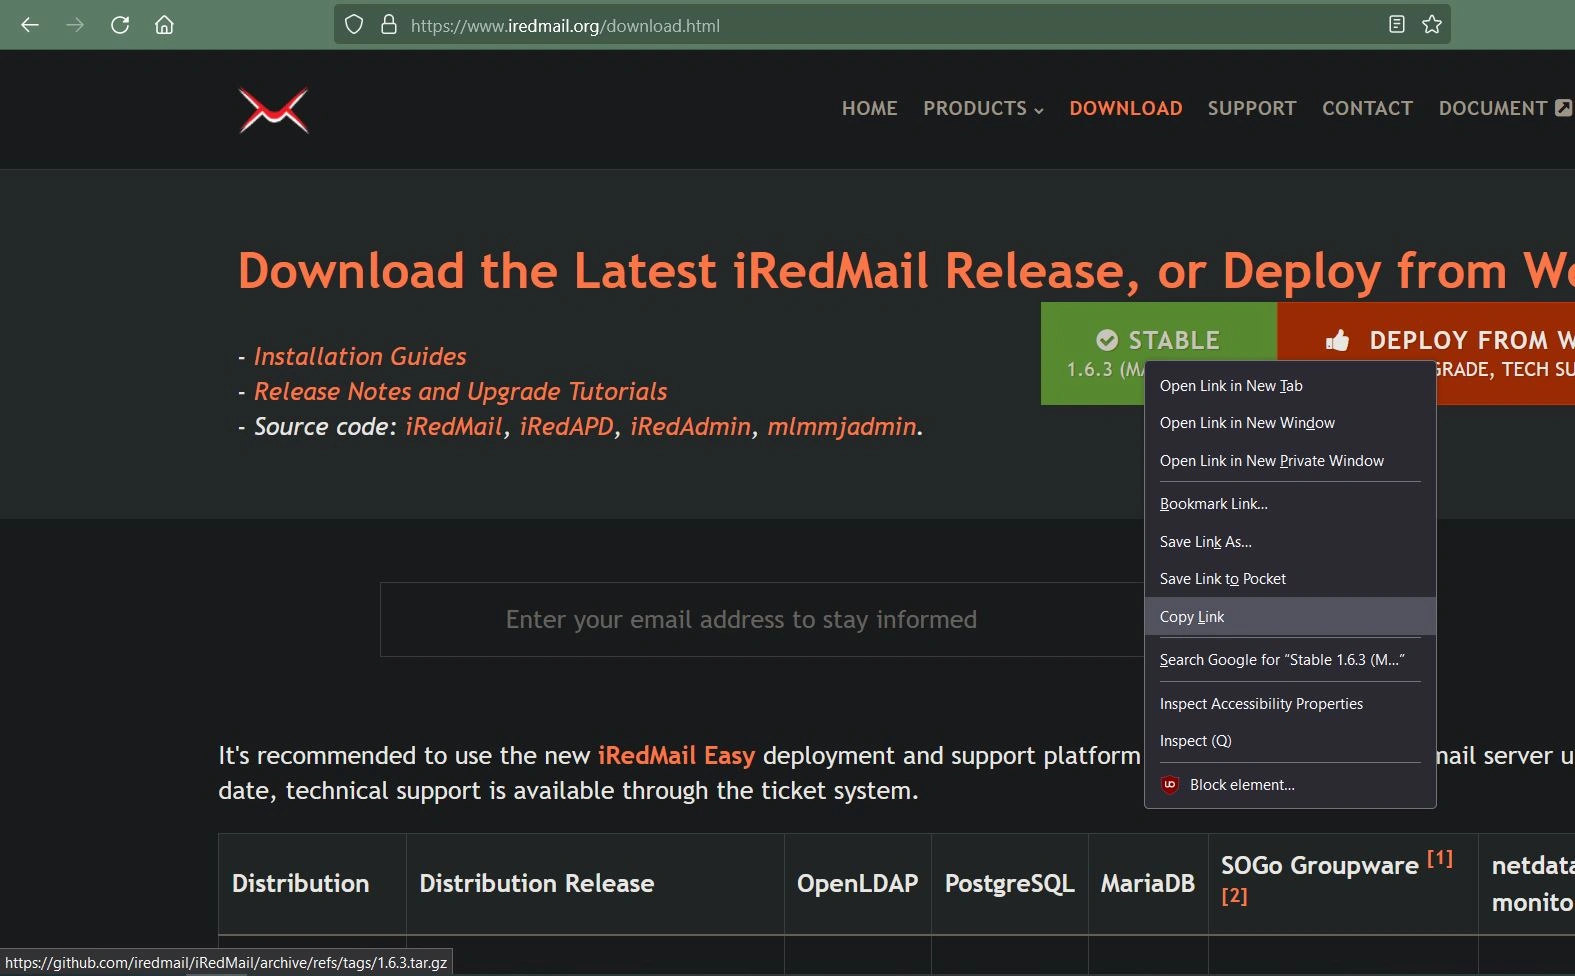
Now that your Ubuntu server is configured, you're ready to download the iRedMail installer. Go to this site and copy the link to their stable version (https://www.iredmail.org/download.html).
Next, use the command "wget {stable version link here}". This should download a zip file.
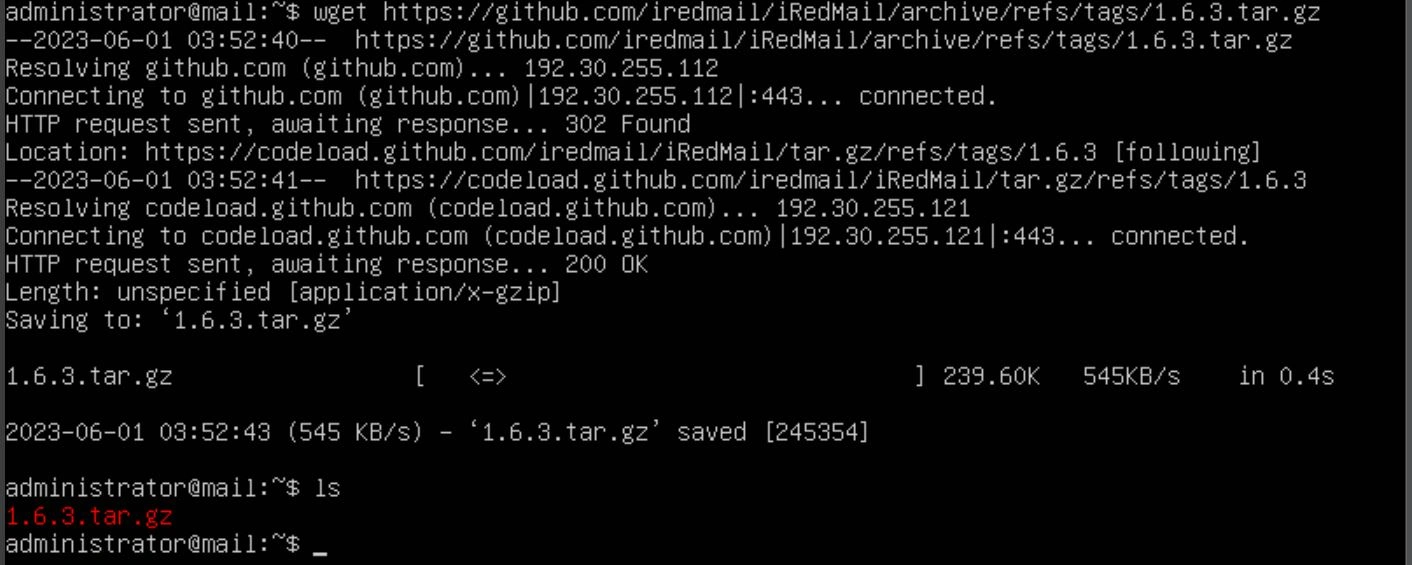
Now use the command "tar zxf {iRedMail_filename}.tar.gz". Once the command completes, you should have a directory. Navigate into that directory with the command "cd {iRedMail_filename}".
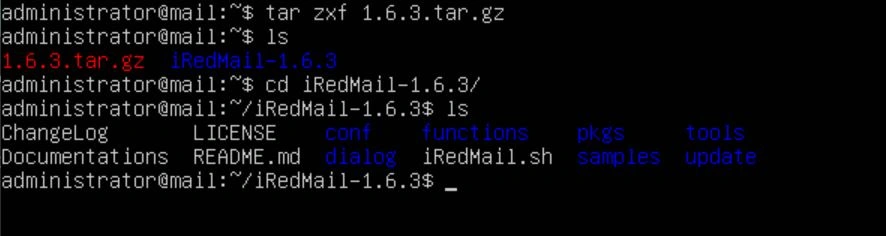
In that directory, there is a shell script called `iRedMail.sh`. Run this script with bash using the command "sudo bash iRedMail.sh".

It's going to ask you a bunch of questions. You want to hit enter to continue and yes when the blue welcome screen comes up.

Next, it's going to ask you about logs. Select the default option. In this case, that would be /var/vmail.

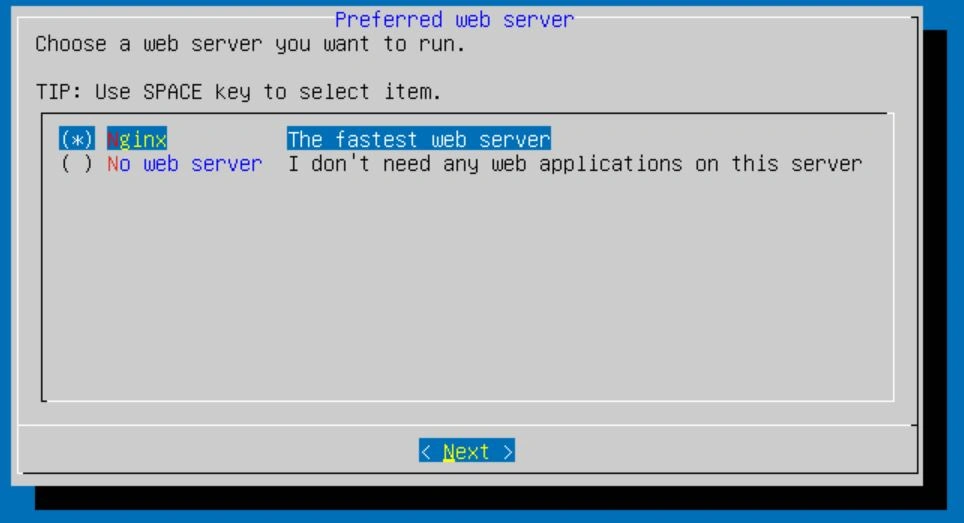
Next, it will ask you about a web server. Leave nginx selected and hit enter to move on to the next screen.
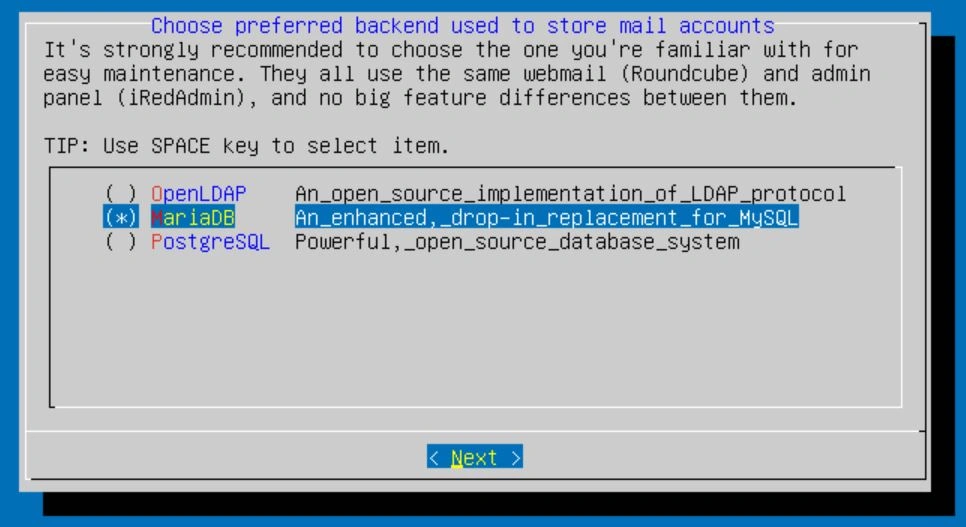
The next option is for the database. I'm going with MariaDB as that's what I'm familiar with, but you can choose whichever you like. You can scroll with arrow keys and select an option with the spacebar. The enter key will confirm your selection.
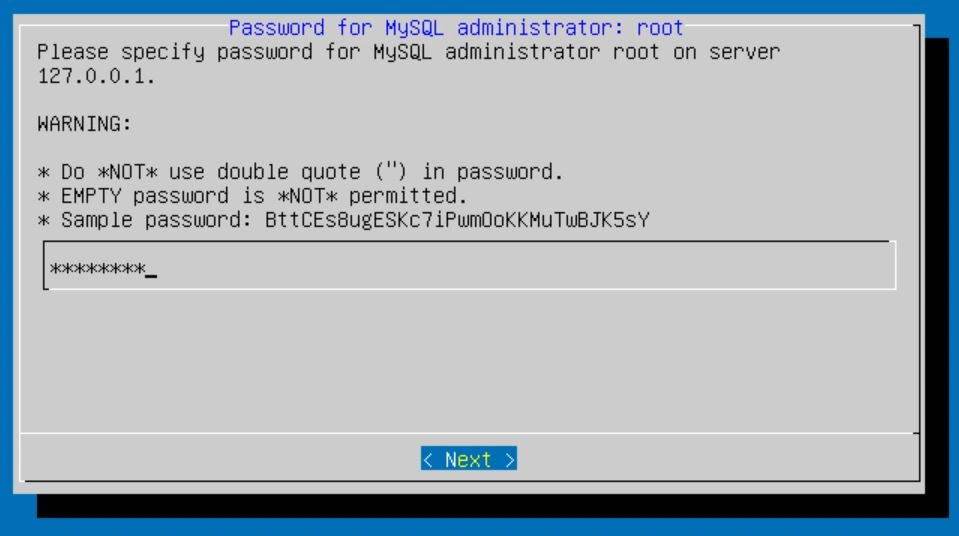
After selecting a database, it will ask you to set a password for the database admin. I would recommend a password over 16 characters for security.
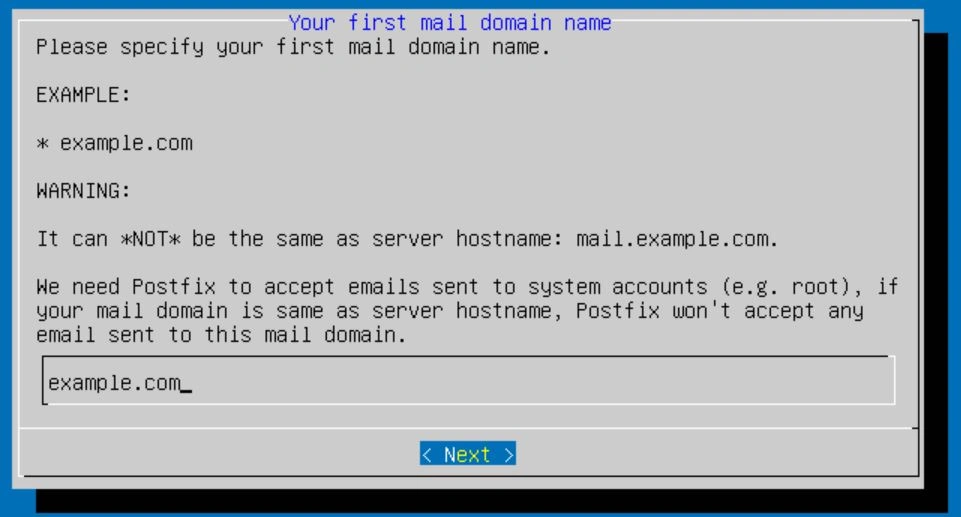
Now it's going to ask you to specify a mail domain name. This should be your FQDN. In my case, I will put example.com.
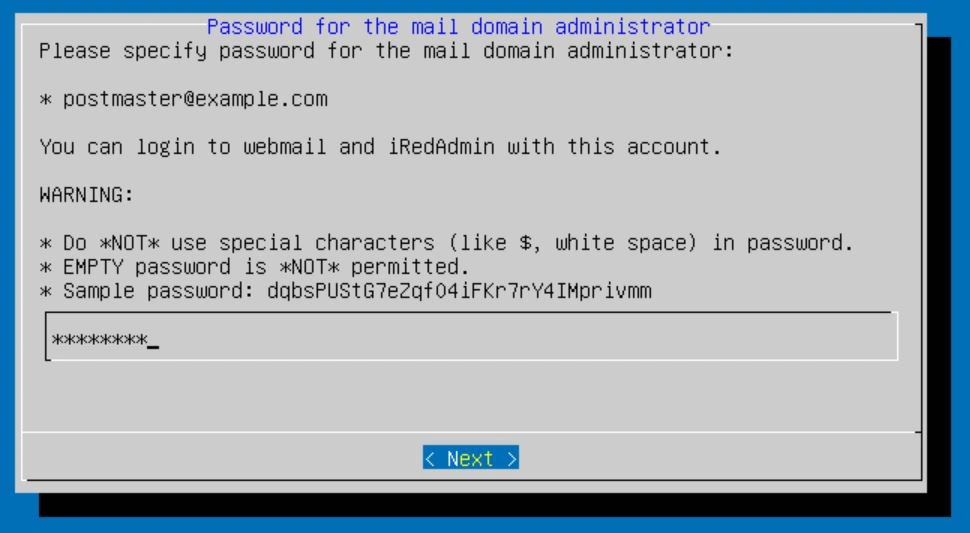
The next thing you should see will be the password selector for the admin account. This is VERY important, so choose something strong and write it down. The email by default should be postmaster@{your FQDN}. For example, mine would be [email protected].
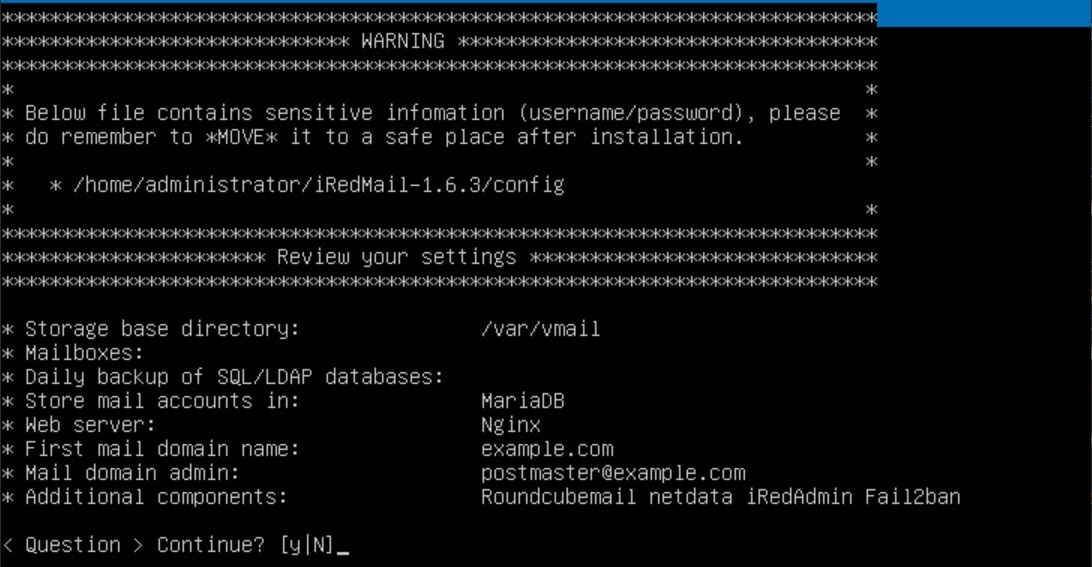
Finally, you should see a screen asking about RoundCubeMail, SOGo, iRedAdmin, and Fail2ban. I would leave the selection as default.

Next, you should be prompted to continue. Keep in mind that there are files that have sensitive information, so put them somewhere secure and limit access to the root user. When you're ready, type "y" and then hit enter.
After about 10 minutes, depending on your internet, it should be done configuring. When it's done, you should see a banner saying "configuration complete" and then a couple of questions. Answer "yes" or "y" to all of them. This will automatically configure the firewall rules for your new server.

Once that's done, you should reboot your server using the command "shutdown -r now".
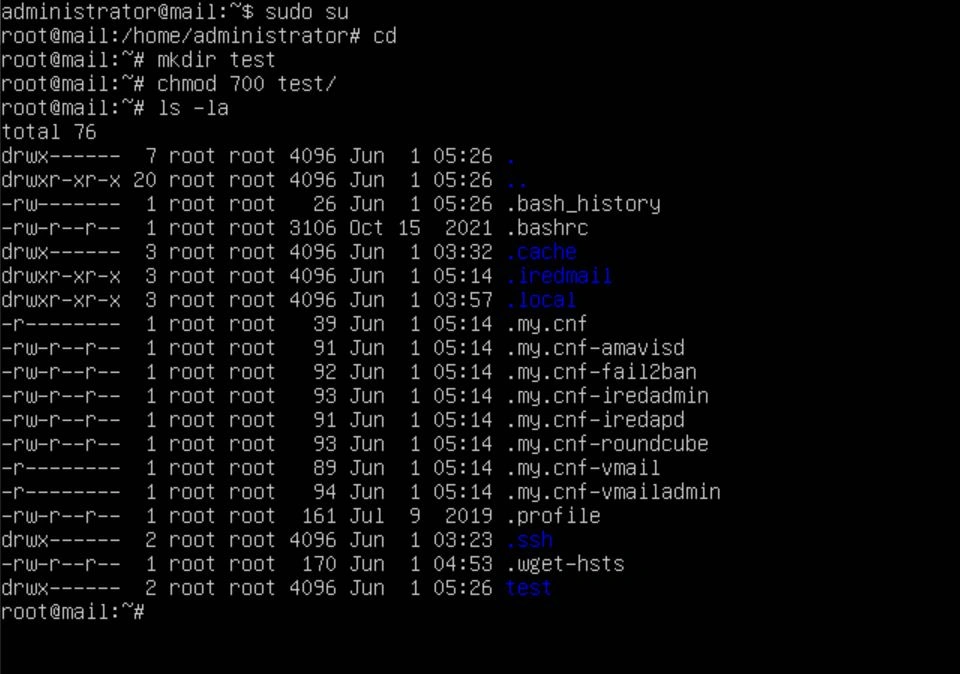
When the server comes back up, we should move the sensitive files to a safe location. You can create one using the following commands: "sudo su" (this will make you root), "cd" (this will move you to the root directory), "mkdir /{directory name}" (this creates a new directory), and then the command "chmod 700 /{directory name}" (this will make it so only the root user can access the directory). To view the permissions of a file, you can use the "ls -la" command.
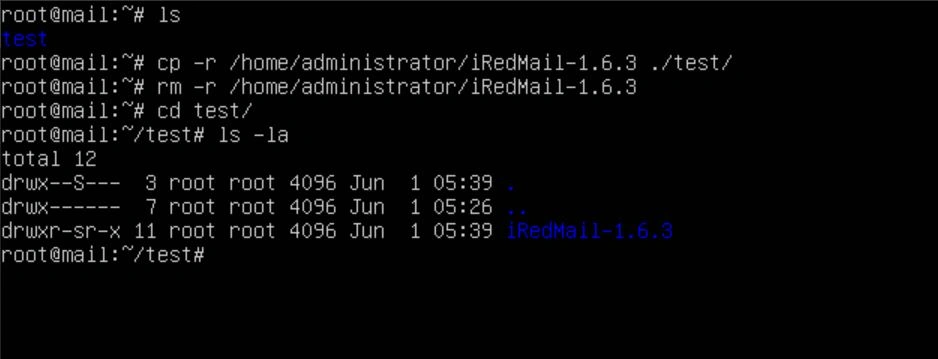
With a secure directory set up, you can now move any files that have sensitive information in them into that directory with the following commands: "cp -r /home/{user}/{ired_directory} ./{your directory}/" (this will move the ired directory into the folder we just made), "rm -r /home/{user}/{ired_directory}" (this removes the ired directory that was left after the copy).
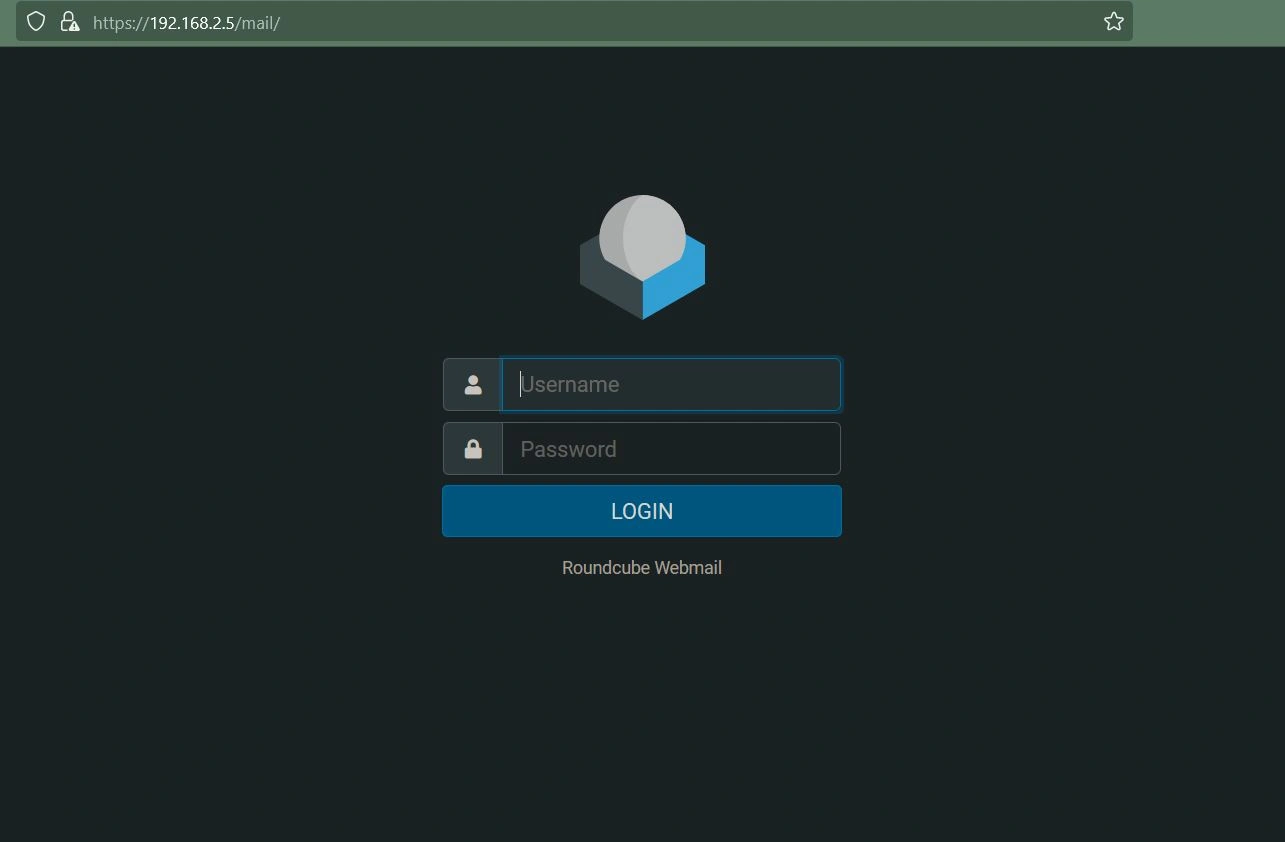
Now that your mail server is up, navigate to the web portal by typing the IP of the server into a browser. In my case, the IP is 192.168.2.5. From here, you will see the RoundCube sign-in page.
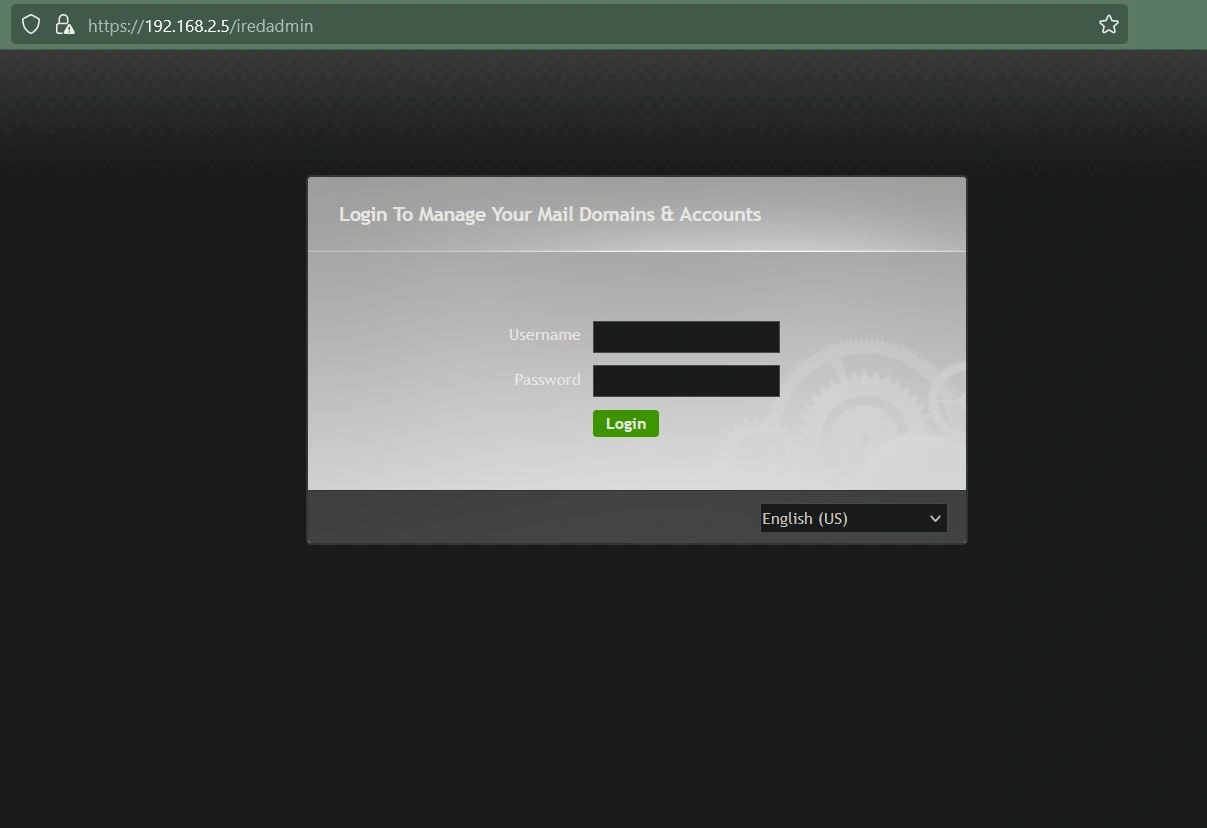
In the URL, replace /mail/ with /iredadmin/. This is how you access the admin panel of your mail server. You can now sign in using the email postmaster@{your FQDN} and the password you created earlier.
Now you have successfully set up an open-source mail server using iRedMail!
Remember to configure your domain's DNS records and DKIM records so that your emails are not rejected by filters. Additionally, configure your firewall on your router to accept and forward packets on port 25.