What You Need
- 1 Server
Note: This is a type 1 hypervisor, so it's supposed to be on bare metal. I haven't tested virtualization, but it's not intended to be virtualized, so a server may be required. Minimum specs: 6 vCPUs and 8 GB of RAM with at least 100 GB of storage.
I installed the XCP-ng ISO on a local server to turn it into a bare-metal hypervisor, also referred to as a type 1 hypervisor (https://xcp-ng.org/#easy-to-install). Additionally, I compiled Xen Orchestra from source (https://github.com/ronivay/XenOrchestraInstallerUpdater) on the hypervisor and used the 'xo-vm-import.sh' script to launch the graphical user interface, known as Xen Orchestra. As a final step, I configured a local storage repository for ISO files, allowing me to easily spin up Ubuntu Server, Ubuntu Desktop, and OpenBSD.
Tutorial
Now with the home network configured, we can set up an XCP-ng server running Xen Orchestra. To start, grab the ISO from the XCP-ng website (https://xcp-ng.org/#easy-to-install). You can load this onto a USB using Balena Etcher (https://etcher.balena.io/). Finally, plug it into your computer and boot from the USB. Keep in mind that this will wipe the hard drive.
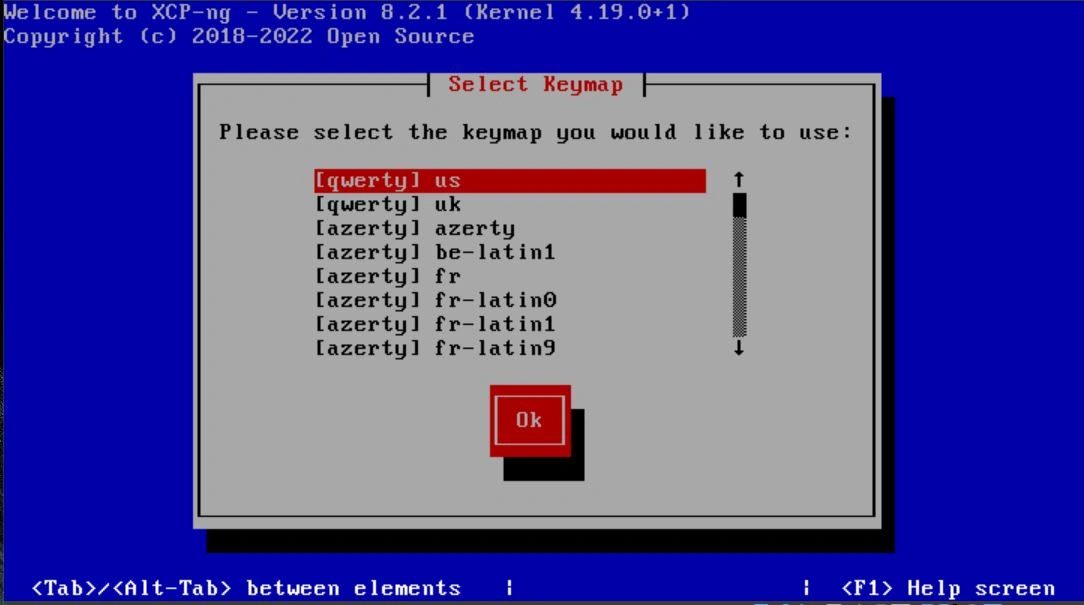
Once the boot process has started, it is going to prompt you to select a keyboard. I chose the default "[qwerty] us". You can use the arrow keys to move up and down and hit Tab to jump to the Ok button and then Enter to continue.
The next screen will tell you about using the ISO to upgrade; simply hit Enter to skip this screen.
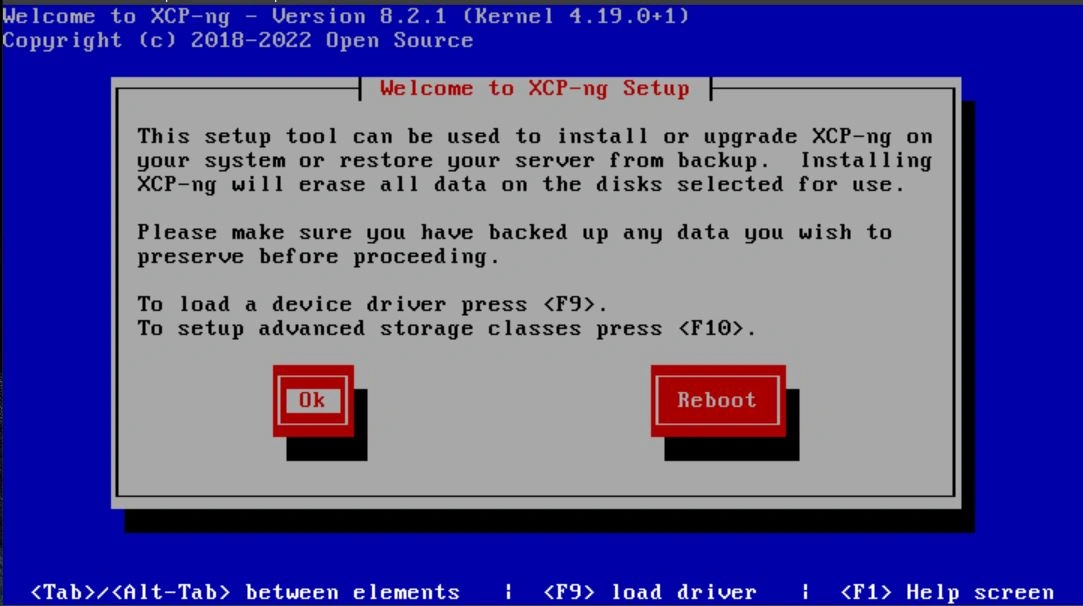
Next, it will ask you to accept the EULA.

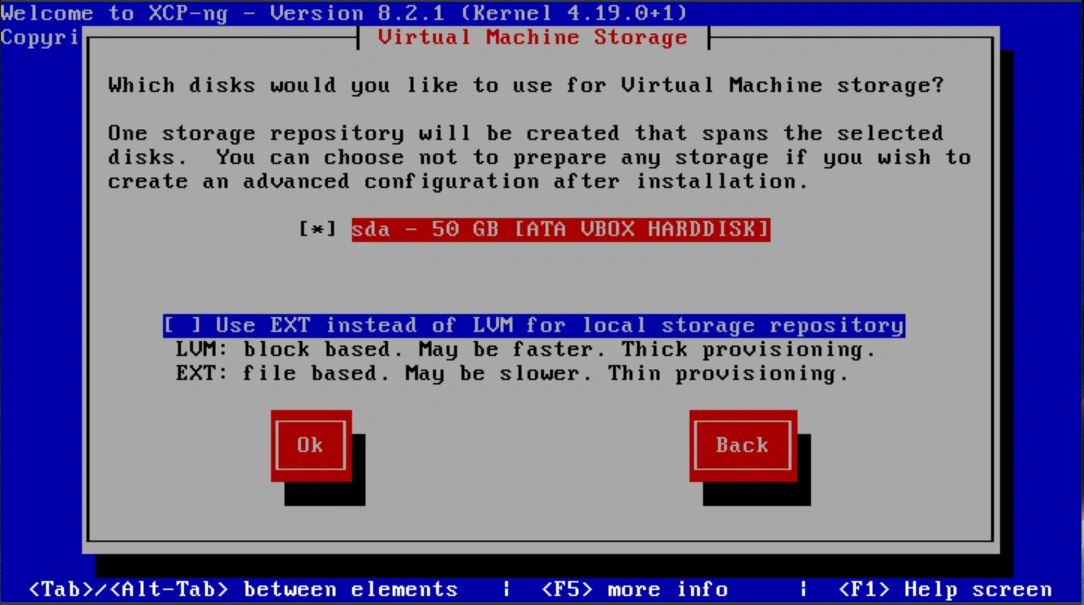
The next screen will ask you about storage; leave this as the defaults unless you need to change it. Again, you can use Tab to hop to the Ok button and Enter to continue.
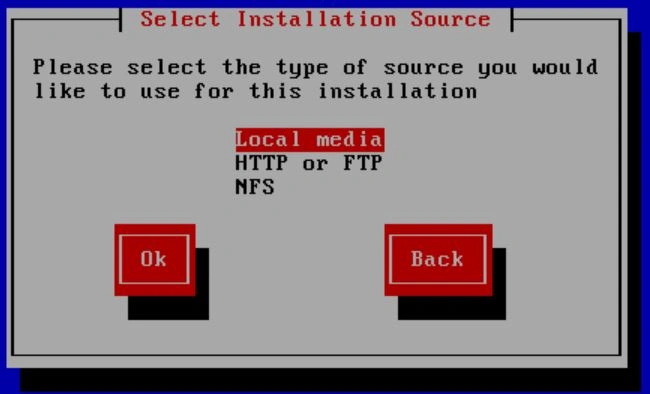
Next is the boot source; select "Local media" if you're booting from the ISO using a USB.
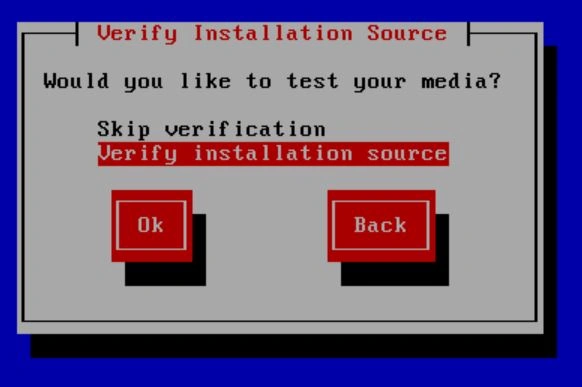
It will then prompt you for media verification. I'm choosing to skip this step, but for verification, it is recommended to verify your media. You can also do this by hashing the ISO with SHA256 and then comparing it to the string on the website. I have copied it here for ease of reference: "SHA256: 93853aba9a71900fe43fd5a0082e2af6ab89acd14168f058ffc89d311690a412" (this is for version 8.2).
The next step involves creating a password. Set something strong, above 16 characters, for security.

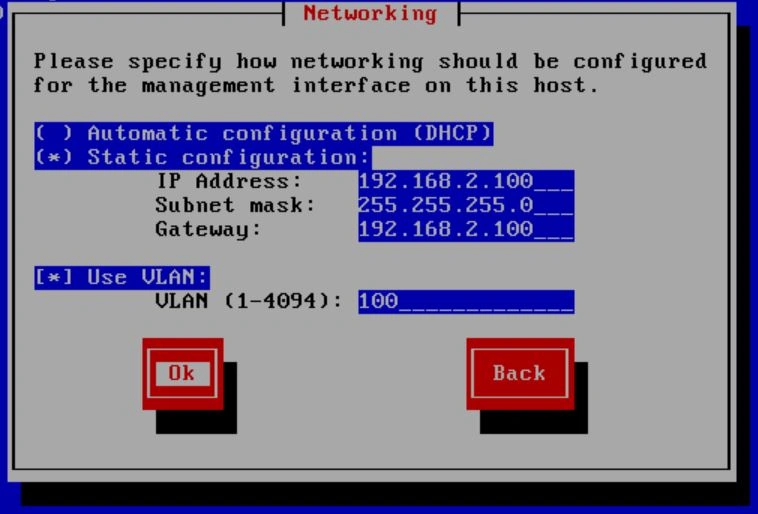
Next is the networking screen. I highly recommend setting a static IP, but you can also use DHCP if needed. In this instance, my IP will be set to 192.168.2.100 with a subnet mask of 255.255.255.0 and a gateway of 192.168.2.1. The VLAN will be 100, but if you don't have VLANs configured, leave it blank. If you want to configure VLANs, refer to my home network project.
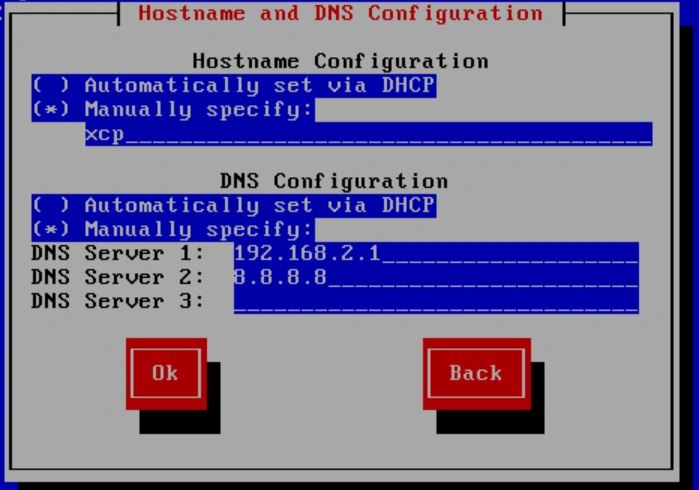
We're almost done with the configuration. The next step is to configure a hostname and DNS settings. I will set the hostname to "xcp," but you can make it whatever you want. For the DNS, I input my router and then Google as a fallback, but you can also let DHCP handle this.
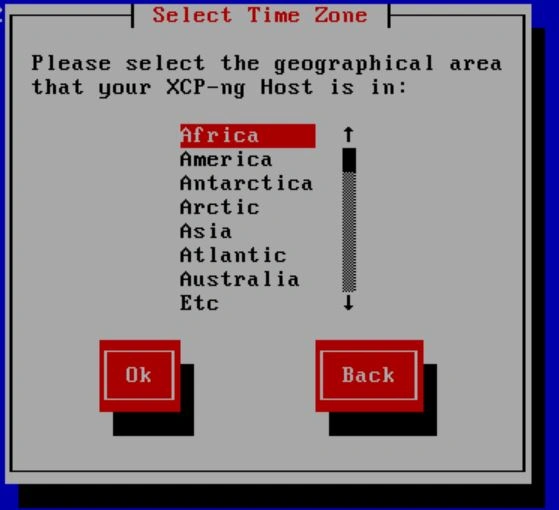
Next, choose your geographical location.
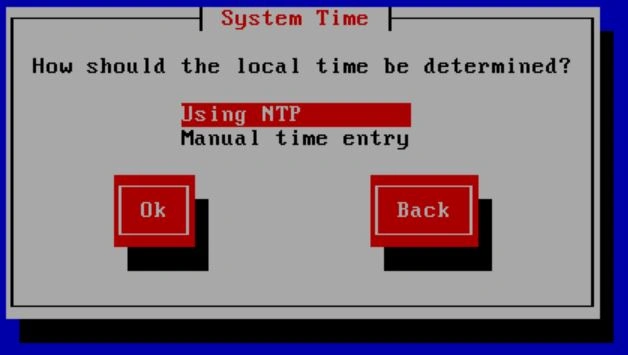
Now it will ask you about local time; select "Using NTP".
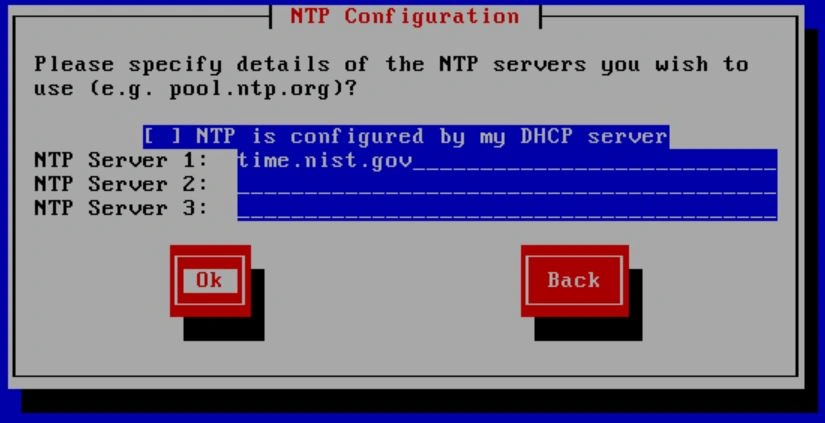
The next step is to input time servers. You can allow DHCP to do this, but I prefer an option with more redundancy, so I use the time servers provided by NIST (https://tf.nist.gov/tf-cgi/servers.cgi). I would recommend inputting at least 2 different time servers, but for this tutorial, I will use the global address for NIST servers.
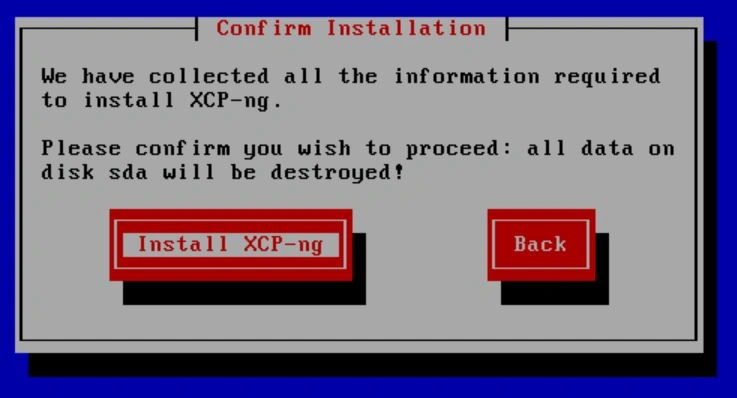
You're almost there. The final step of the imaging process is confirming to wipe the disk. Select "Install XCP-ng" and then wait. Grab a coffee or something, maybe do some lunges.
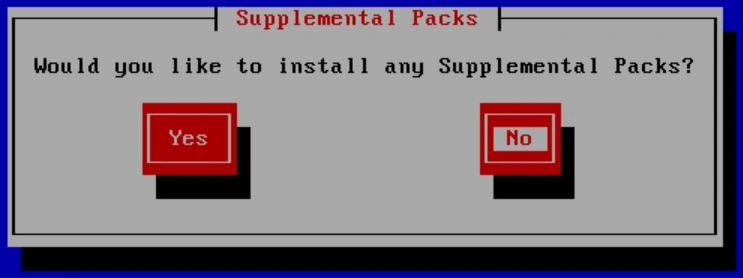
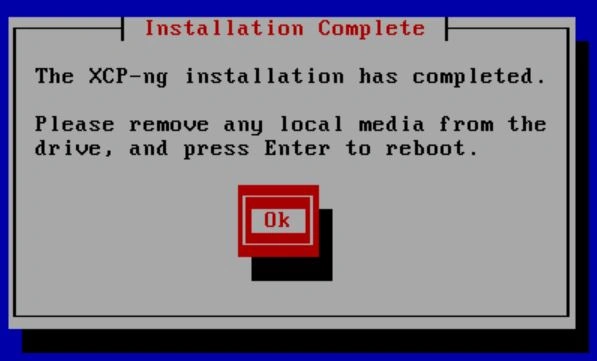
When you get back, it may ask you if you want to install the supplemental packs. Select "No" and then wait again.
When it's done, you will get a pop-up saying to remove the media. Pop the USB out and select Ok.
After finishing the imaging steps and unmounting the ISO, The computer will restart and then you should see a splash screen with multiple options. You can navigate this screen with the arrow keys and press enter to select options. (Note this picture was captured in a virtualbox environment so the network information is not accurate)
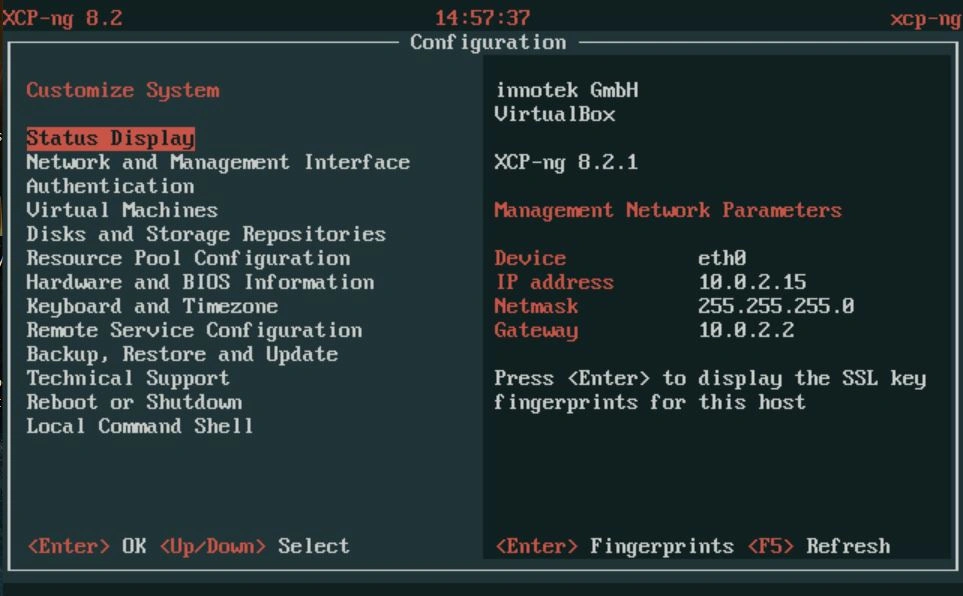
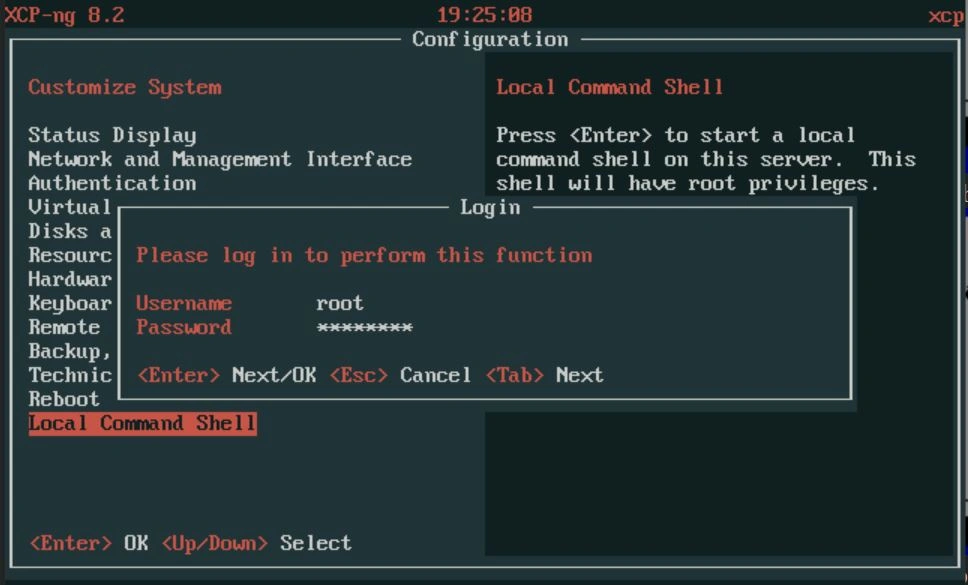
The option we want is the local command shell. Select that option and then enter the password you configured.
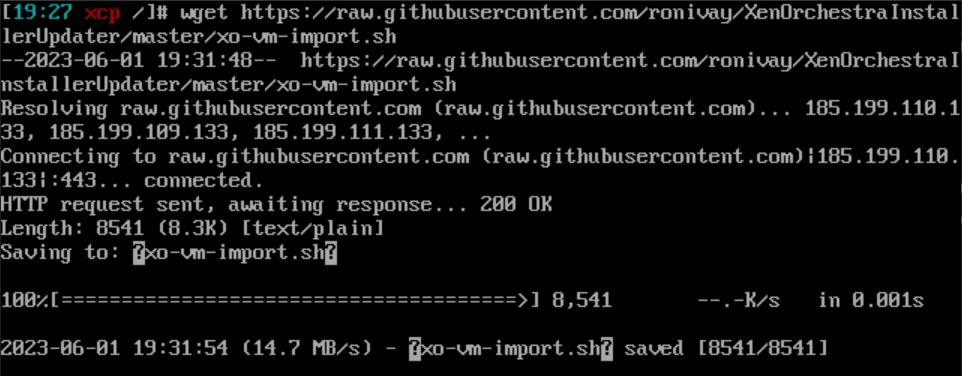
With the shell open, we want to pull down the deployment script for Xen Orchestra. To start, use the following command: "wget https://raw.githubusercontent.com/ronivay/XenOrchestraInstallerUpdater/master/xo-vm-import.sh".
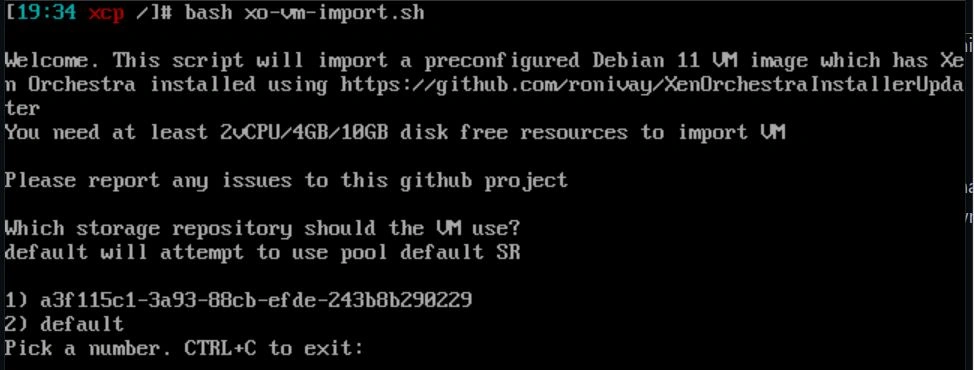
Now we are going to run the script with the command "bash xo-vm-import.sh". It will prompt you to select a storage repository for the VM. If you're following along, there should only be 2 options: default and a long string. Choose the long string by typing the number associated with it.
Next, it will ask which network to select. Choose the one associated with eth0.

Next is the network configuration. Just let DHCP handle this unless it errors out in which case give it a static IP for now you can change it later. Make sure you reserve the address on your router. This IP will be used to reach the management interface from a browser, so remember it. In my case, I will use 192.168.2.3. Once that's done, just wait. It will download the VM. Also, the VM requires a minimum of 4 vCPUs, 8 gigs of RAM, and 20 gigs of space. I already took this into account for the minimum specs above, so if you follow that, you should be fine.
Now that the VM is up, we want to configure SSH and the web interface login. The username and password by default for SSH are 'xo' and 'xopass'. So, login through SSH and change that. You should be prompted upon logging in for the first time, but if you're not, use the command 'passwd' and follow the prompts to change the password. I configured it so the server is only accessible through keys located on my security server. Refer to my Security Onion Project for a guide on setting that up.

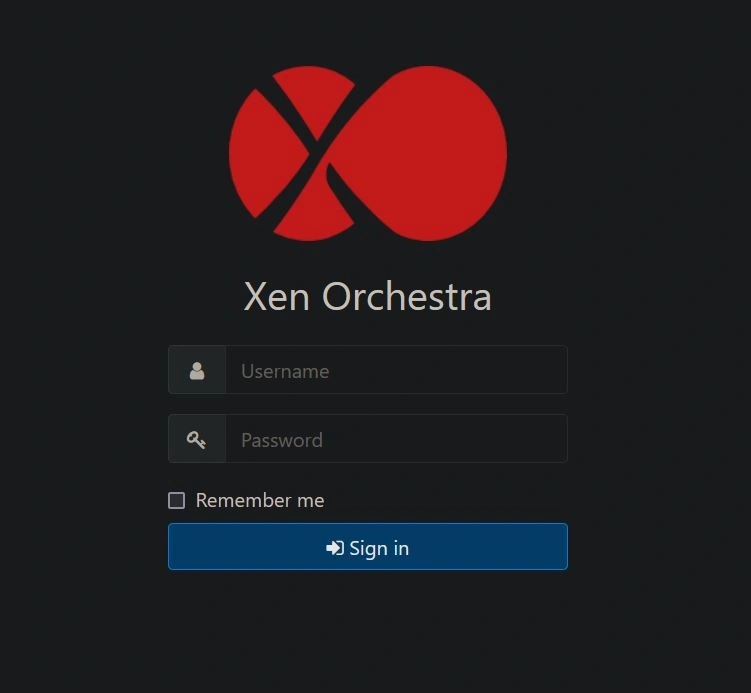
Now, go to a browser and enter the IP of the Xen VM (192.168.2.3 for me) to reach the web interface. Once you get to the web interface, the default username and password are '[email protected]' and 'admin'. Make sure you change the password again. It should prompt you, but if it doesn't, simply go to Settings and then Users. From there, you can click to change the password.
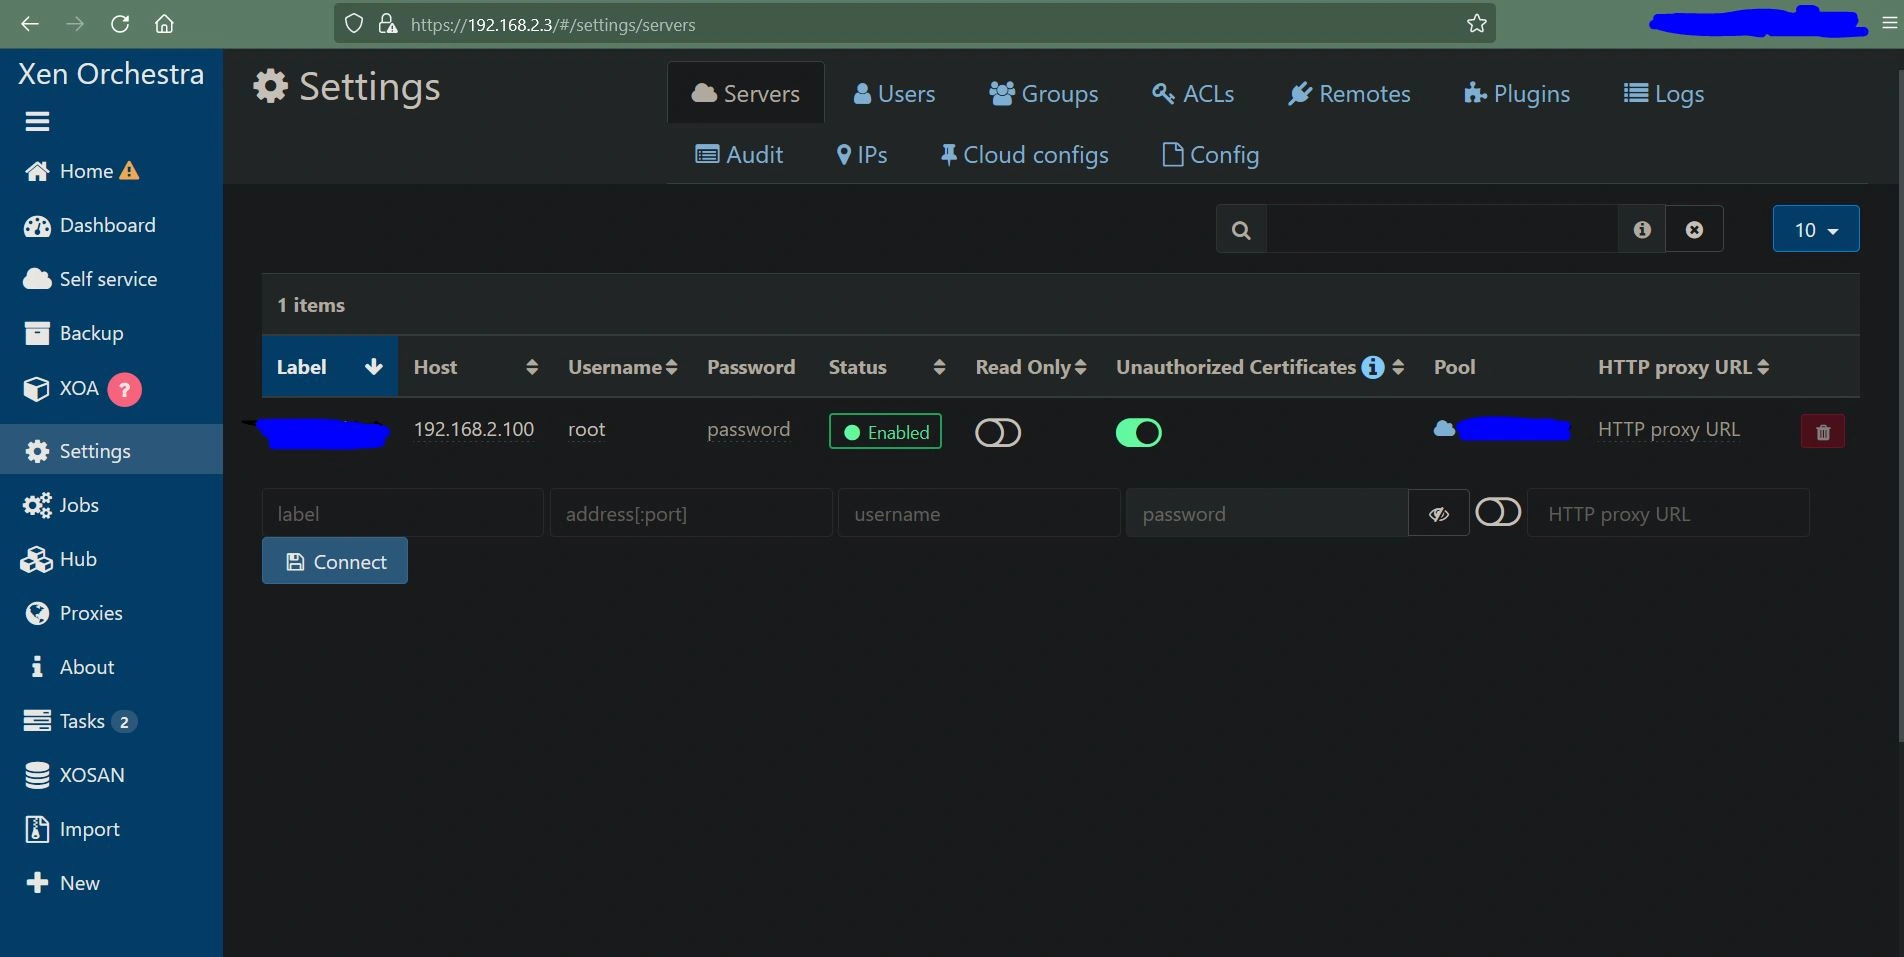
Once logged in, head to the Settings section on the left and select Servers. Here, we need to add our server. Type in the IP of your XCP-ng server (192.168.2.100 in my case) and then type in the username and password you use to log in to that server. If all goes well, you should see "connected" appear. Also, make sure to check "Unauthorized Certificates".
Now that that's done, the last step is to configure local storage for the ISO files so you can create VMs.
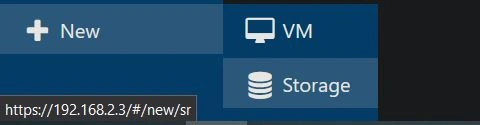
On the left, select the "New" button and choose Storage.
Now go back to your XCP-ng server and create a new root directory called '/ISO' with the command "mkdir /ISO".

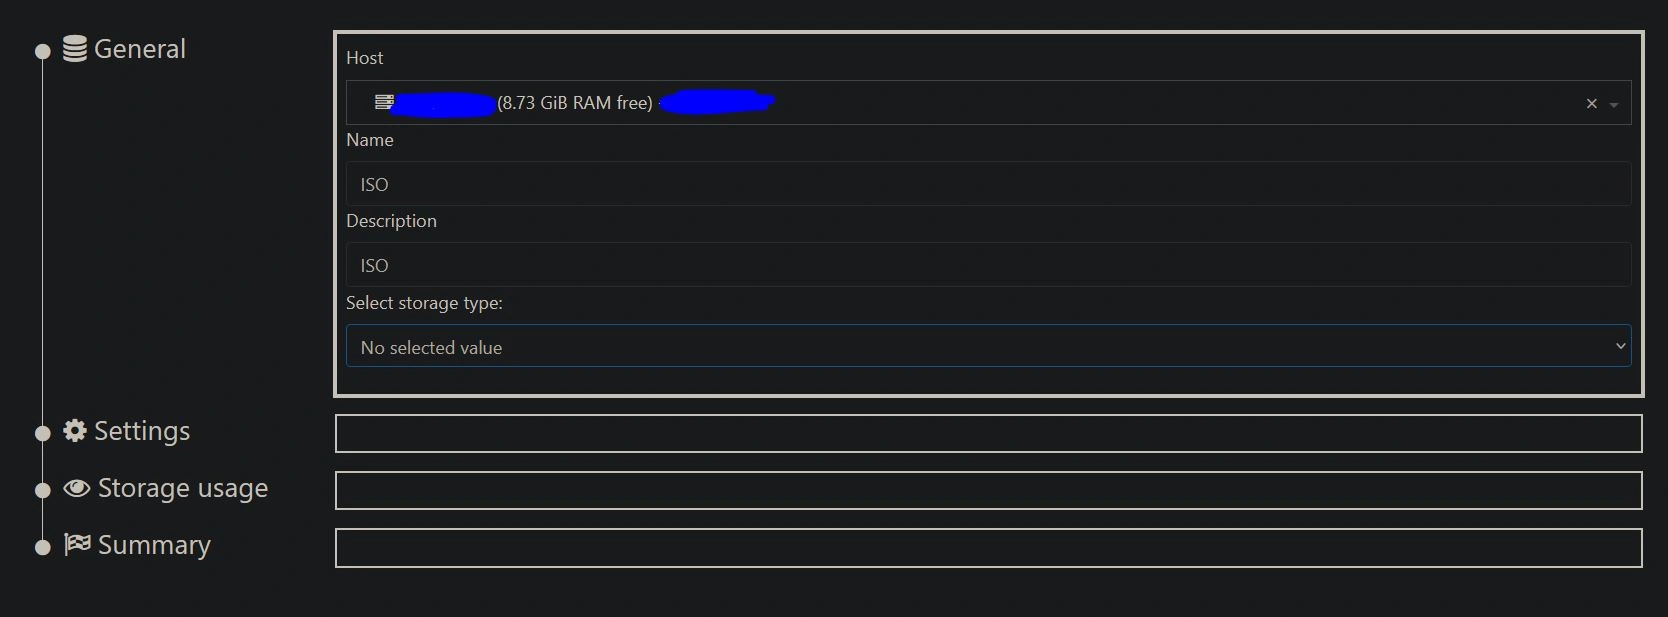
Back on your Xen Orchestra GUI, select the Host we just added, then input the name and description. In this case, I will use "ISO" for both.
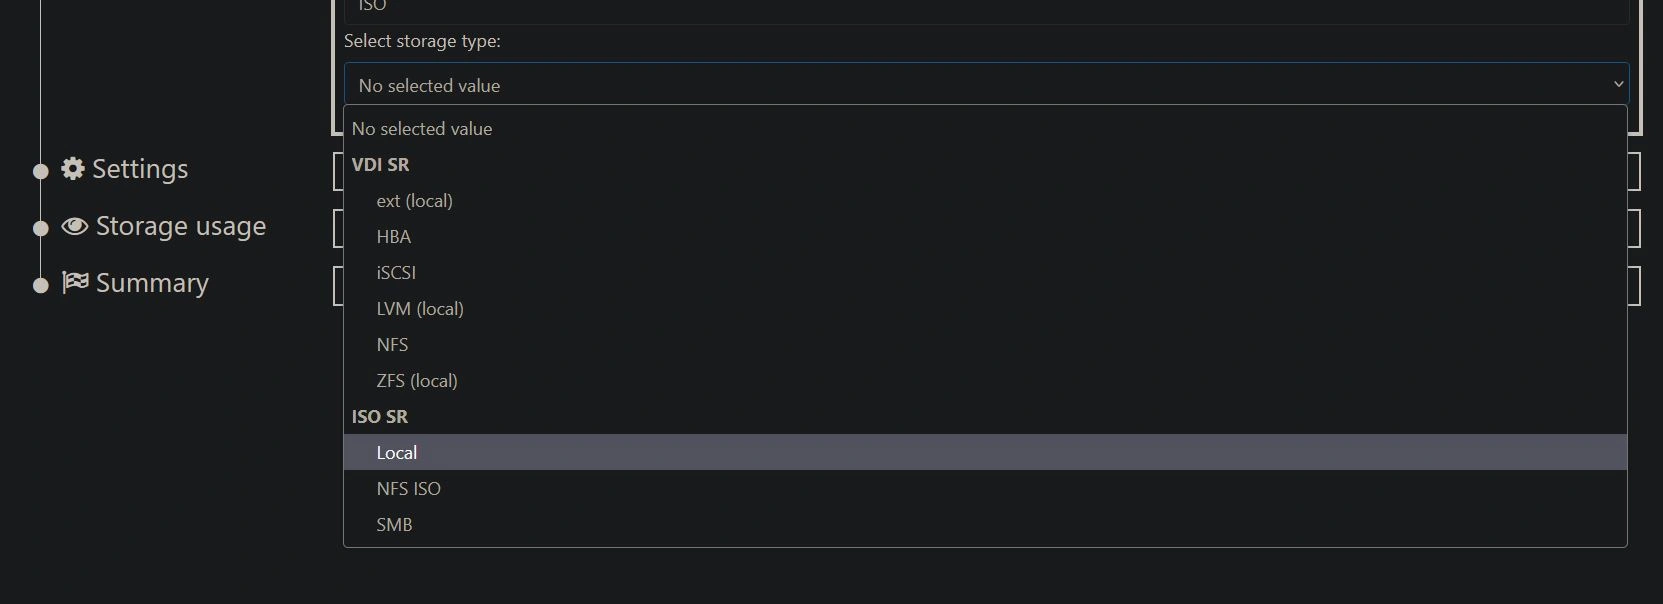
Then select the storage type, and in the drop-down under "ISO SR", choose "Local".
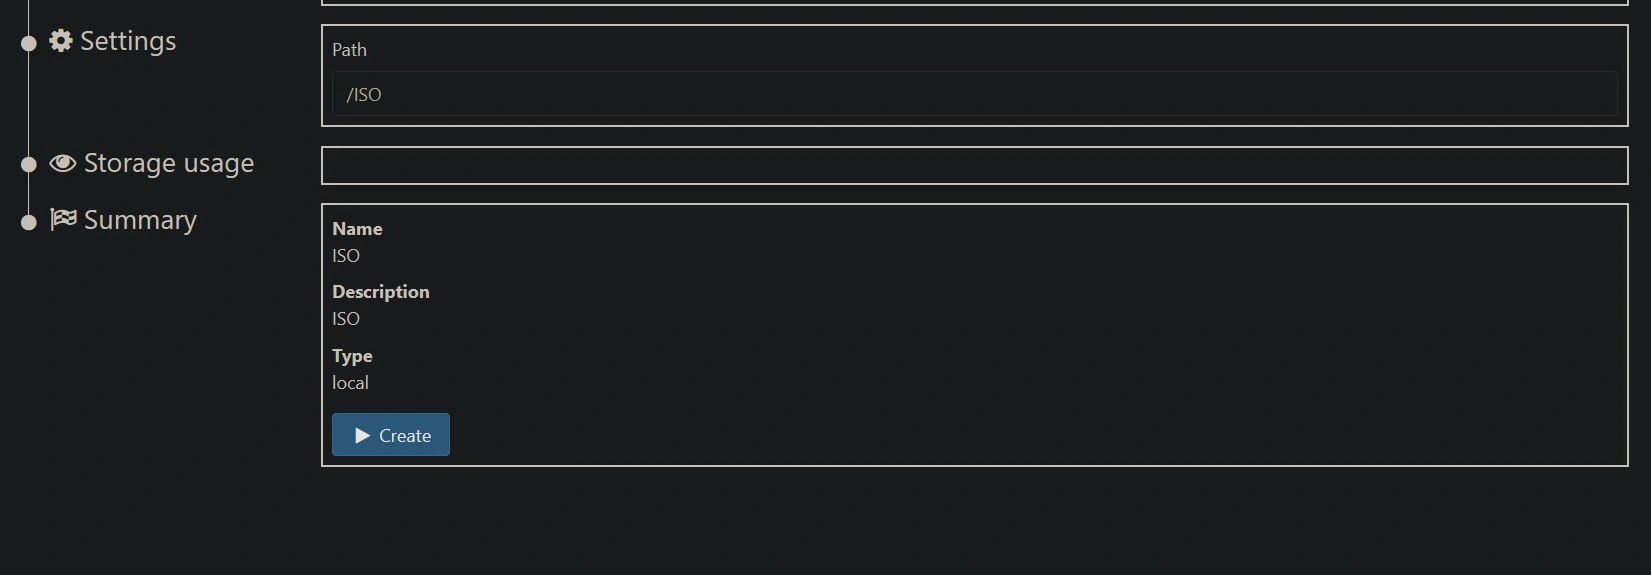
Finally, type in the path. In this case, it would be "/ISO", and then click Create. You can now access any ISO files you put in that directory. To download ISO files, use 'cd' to navigate to the '/ISO' directory and then use the command "wget {url to iso}". From there, they should be available when setting up VMs.
Congratulations! You just set up a bare-metal hypervisor with Xen Orchestra as a GUI. There's a lot you can do here, so feel free to explore. If you want, check out some of my other projects for ideas on what you can build on this new hypervisor.