What You Need
- 1 Router
- 1 Switch
Note: The router provided by most Internet Service Providers (ISPs) may not allow you to change specific settings. In that case, you may need to buy your own router to follow along.
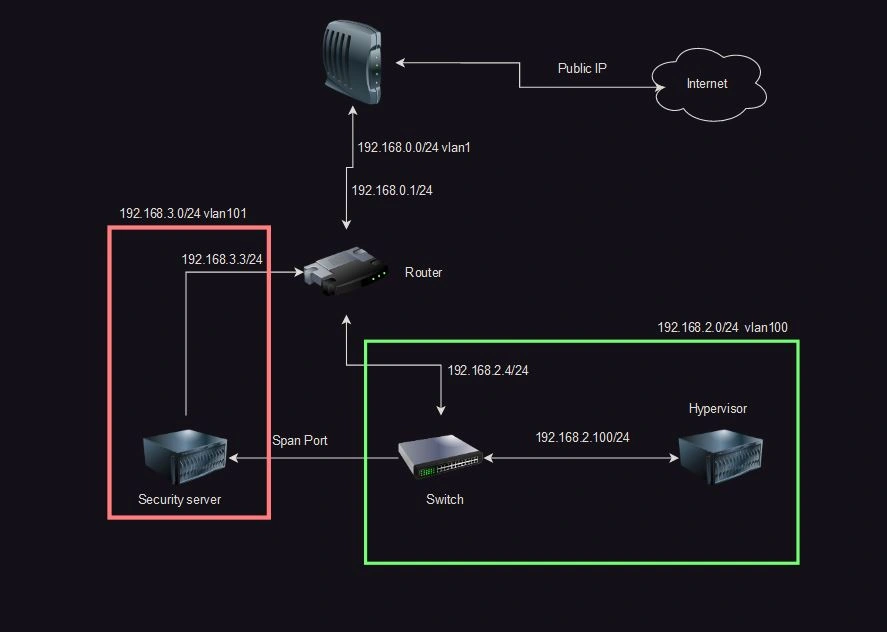
I set up a home network to host my websites, mail server, and upgrade my home lab. I used a router and a switch to set up three subnets and three VLANs, creating three separate internal networks. One was dedicated to personal use, another for projects and my home lab, and the final one for my security monitoring tools.
Tutorial
The goal of this tutorial is to guide you through the process of setting up 3 VLANs and there associated subnets for a simple home lab setup
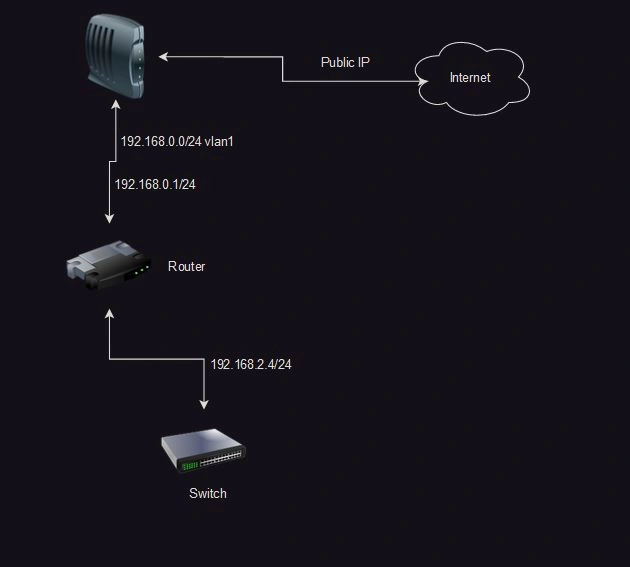
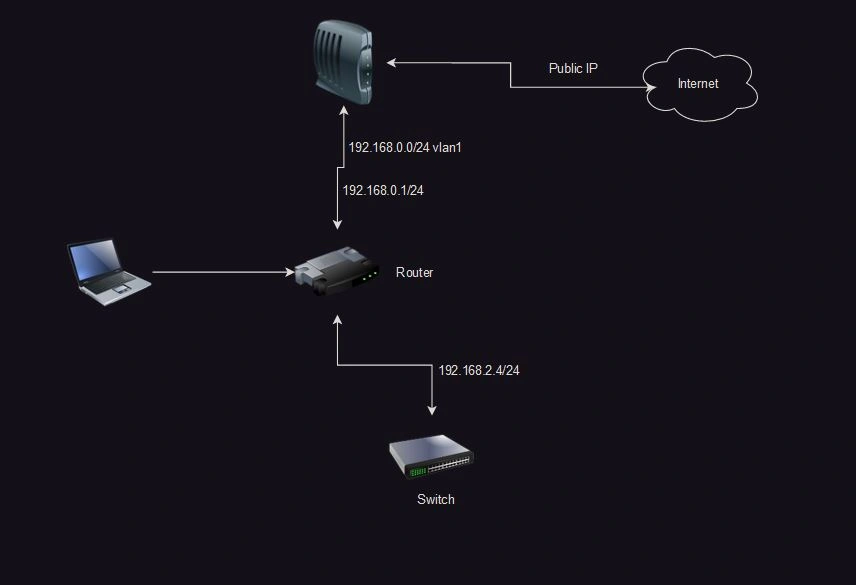
I started by hooking up my modem into port 1 of my router, which was labeled as the WAN port. For now, the only IP that matters is the internal IP 192.168.0.1. Then I wired the switch to the router, and finally, I hooked up my server to the switch.
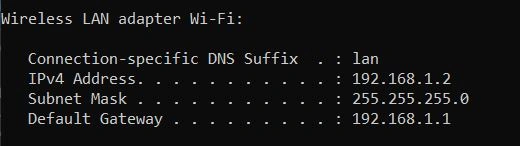
Now we need to configure the router and switch. With both of them wired up, we can manually plug into the router and access the login page by going to 192.168.1.1. If you don't know the internal IP of the router, you can find it by opening a terminal or command prompt and typing "ipconfig" on Windows or "ifconfig" on Linux. If "ifconfig" doesn't work, try the command "ip a". In the output, you should see a Default Gateway, and the IP following it is your router's IP address (note my IP is 192.168.1.2 even though my network diagram doesn't show this because I have a wireless network that I configured to be on a different subnet).
Now with the gateway identified, we can access the login page. We need to find the default credentials for your router. Most of them are simply "admin" for both the username and password, but if that doesn't work for your router, Google your router's name followed by "default credentials." For example, "Asus xxx router default credentials." If your router is supplied by an ISP, you may have to call them to get the login credentials.

You may be prompted to change your password after logging in. It's recommended to use a strong password, preferably more than 16 characters long.
I'm using a TP-Link router, but be aware that some TP-Link routers have vulnerabilities, so make sure you update the firmware. Your router's login page may look different, so explore around and find where these four things are located: "LAN, VLAN, Access Control, and Port Triggering". TP-Link decided to have weird names for the last two, so their common names are "Firewall" and "Port Forwarding".
Let's start with LAN. Open the LAN page. Here you can configure different subnets for my home network. I configured 2 other subnets: 192.168.3.0/24 on VLAN 101 and 192.168.2.0/24 on VLAN 100. The /24 is a subnet, which I will explain later, but it translates to 255.255.255.0.
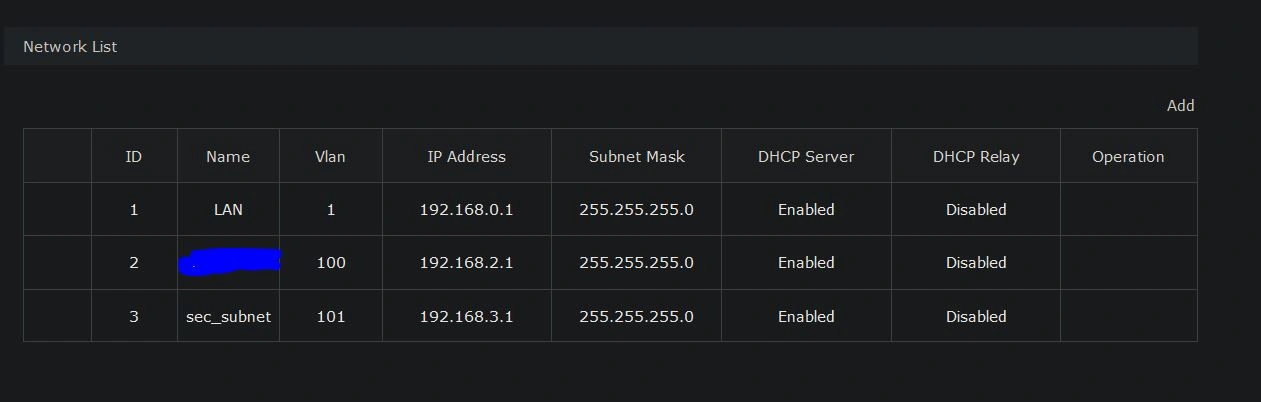
Next, let's take a look at the DHCP tab. Here you can see all devices that are connected and their assigned IP addresses. The first thing you should do is set IP reservations for your switch. In my case, I have it set to 192.168.2.4

Now that we have our subnets, let's assign them to ports. Go to the VLAN tab. There, you should see all 3 of your subnets and VLAN 4094 for your WAN. You can ignore this. The .2.1 subnet should be on VLAN 100 with no ports assigned, and the same for the .3.1 subnet on VLAN 101 with no ports. We're going to edit this and give VLAN .2.1 port 3 (UNTAG) and .3.1 port 5 (UNTAG). Make sure they are set to UNTAG so each VLAN can communicate with each other VLAN. We will be changing this later, but while we're still setting up, this makes configuration easier.
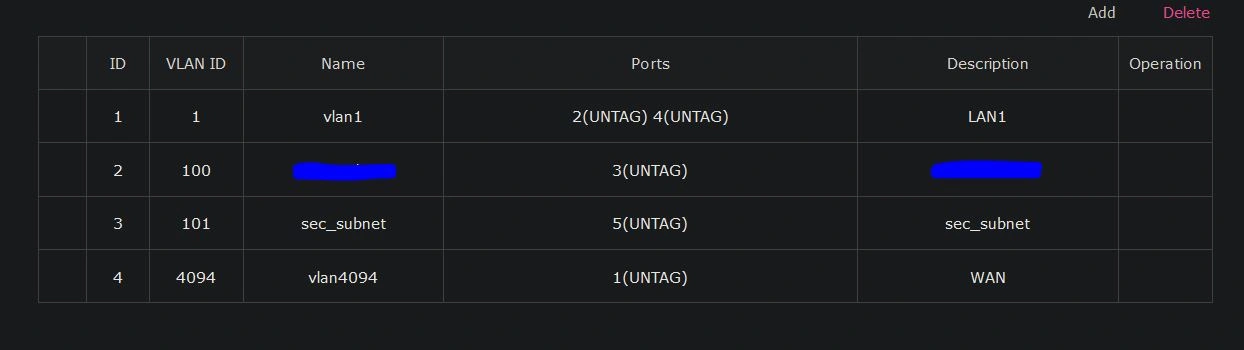
To explain what we just did, we assigned port 3 to the 192.168.2.0/24 VLAN 100. Now, if we connect the switch to this port, all ports on the switch will be in the 192.168.2.0/24 range and communicate on VLAN 100. We can use this to expand the available ports we have while preparing to segregate the VLANs in the future.
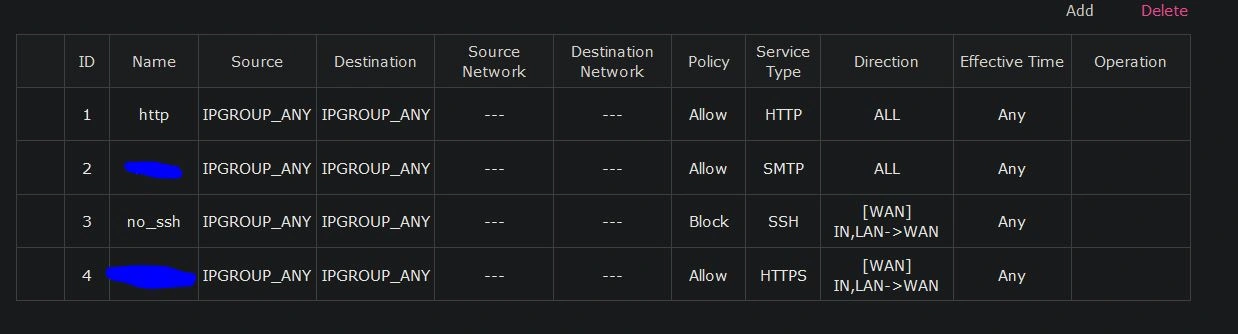
We need to configure the firewall to allow incoming traffic for specific ports. In this instance, I plan to host a website and a mail server, so I configured an allow rule for ports 80, 443, and 25. Port 80 and 443 are for HTTP and HTTPS, respectively, and port 25 is for Secure Mail Transport Protocol (SMTP). Once your allow rules are configured It is also recommended for security to configure a default deny rule, For this tutorial I only configured a block for ssh as this is a temporary setup.
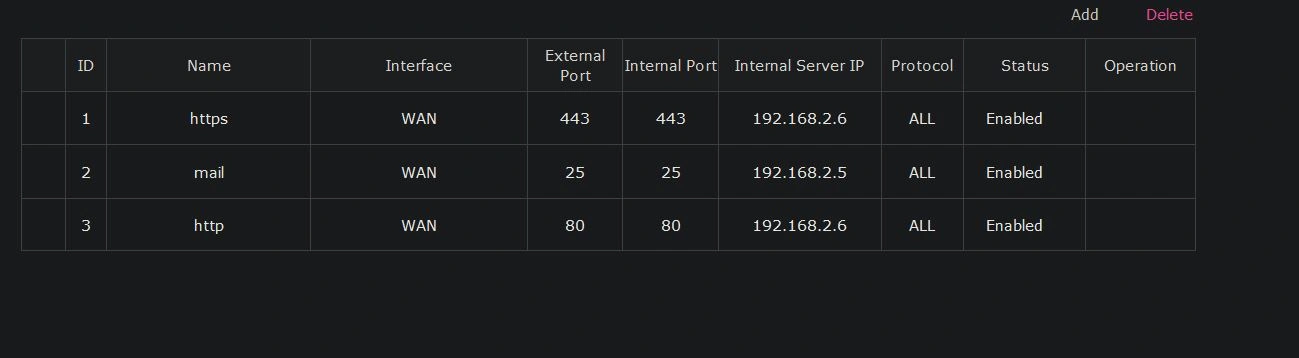
Finally, we configure port forwarding. In this instance, I need ports 80 and 443 to hit my reverse proxy, so I configure port 80 and 443 to forward to my reverse proxy server, which is using the IP 192.168.2.6. Port 25 needs to be forwarded to the IP 192.168.2.5 where my mail server lives.
There's a lot more we can do, but for a basic network setup, this will work. I can't tutorialize every router out there, so explore around the interface and see what cool things you can do. I would also recommend setting up a pfSense firewall between your router and your home network for more granular control. Keep an eye out for that project coming soon.